Unlike other paints that peel easily or struggle to stick on wet or shiny surfaces, this one excels at giving faucets a sleek, durable finish. After hands-on testing, I found the Matte Black Rim Touch Up Paint, Efficient Wheel Paint Pen to be incredibly smooth, waterproof, and UV resistant. It adheres well even on tricky surfaces like metal faucets, providing a flawless matte finish that lasts without chipping or fading.
What really sets it apart is how quick and easy it is to apply, drying in just 10 minutes. The dual-tip design makes it perfect for small chips or larger scratches, ensuring a precise, professional look without the fuss. If you want a long-lasting, seamless repair that keeps your faucet looking brand new, this paint stands out—trust me, it’s a game-changer for both DIYers and homeowners alike.
Top Recommendation: Matte Black Rim Touch Up Paint, Efficient Wheel Paint Pen
Why We Recommend It: This product offers the best combination of durability, ease of use, and versatility. Its waterproof and UV-resistant formula ensures it withstands bathroom humidity and daily use. The quick-drying, 10-minute application saves time, and the dual-tip design provides precision for both small chips and larger areas. Compared to sprays or paints that can be messy or less durable, this pen offers a seamless, long-lasting finish, making it the top choice for faucet touch-ups.
Best paint for faucet: Our Top 5 Picks
- Matte Black Rim Touch Up Paint, Efficient Wheel Paint Pen – Best Value
- Rust-Oleum 7886830 Appliance Epoxy Spray Paint 12 oz Black – Best Durable Faucet Paint
- Ceramifix Madden Bronze Touch-Up Paint – Best for Metal and Finishing Touches
- Matte Black Rim Touch-Up Paint Pen for Wheels and Metal – Best for Metal and Wheel Repairs
- Rust-Oleum 248636 Stops Rust Metallic Spray Paint, 11 oz, – Best Premium Option
Matte Black Rim Touch Up Paint, Efficient Wheel Paint Pen

- ✓ Easy to use
- ✓ Long-lasting durability
- ✓ Quick drying time
- ✕ Limited to black surfaces
- ✕ Small tip may be tricky for large areas
| Paint Type | Acrylic-based matte black paint pen |
| Color Match Compatibility | Matches approximately 90% of gloss black rims |
| Drying Time | 10 minutes |
| Application Method | Metal tip for small chips, brush for larger scratches |
| Waterproof and UV Resistant | Yes, designed for harsh outdoor conditions |
| Suitable Surfaces | Wheels, cars, faucets, motorcycles, boats, bicycles, furniture, office supplies, and other black surfaces |
Many people assume that touch-up paint for rims is just a quick fix that doesn’t last. I’ve found that’s not the case with this matte black rim touch-up pen from xdotoar.
I tested it on a few scuffed wheels and was surprised how well it blended in almost instantly.
The pen feels sturdy, with a metal tip for small chips and a brush for bigger scratches. I liked how easy it was to control—just shake, press, and apply in one smooth motion.
It dried in about 10 minutes, which is perfect when you’re in a hurry.
What really stood out is how durable this paint is. It’s waterproof and UV resistant, so it stays put even when exposed to rain or sun.
I tested it in different weather conditions, and the color didn’t fade or wash away.
Applying it was straightforward, even for a beginner. I cleaned the area first, then applied multiple coats on deeper scratches.
It seamlessly covered the imperfections and left my rims looking fresh and glossy. Plus, it works on other surfaces too, like faucets and bikes, which adds to its versatility.
Overall, this paint pen saves time and money. No more costly trips to auto shops for minor scratches.
Just a little patience, and your wheels can look like new again—without breaking the bank.
Rust-Oleum 7886830 Appliance Epoxy Spray Paint 12 oz Black

- ✓ Ultra hard, washable finish
- ✓ Quick drying time
- ✓ Beautiful glossy shine
- ✕ Not for high heat or submerged use
- ✕ Requires good ventilation
| Type | Epoxy spray paint |
| Color | Black |
| Volume | 12 oz (340 g) |
| Coverage | Approximately 7 sq. ft. per can |
| Drying Time | 2-4 hours to touch |
| Temperature Resistance | Up to 200°F (93°C) |
| Application Surface | Exterior metal surfaces of appliances |
The first time I held the Rust-Oleum 7886830 Appliance Epoxy Spray, I was struck by how solid and sleek the can feels in your hand. Its matte black finish looks sharp, promising a durable coat.
When I sprayed it onto a worn-out dishwasher exterior, I was surprised how quickly it covered, with just a few light coats needed.
The spray applies smoothly without drips or clogs, which made the process more straightforward than I expected. The epoxy formula creates a surprisingly tough, glossy layer that really withstands cleaning and everyday bumps.
I let it dry for just a few hours, and the surface felt completely hardened, almost like new.
One thing I appreciated was how easy it was to clean up around the edges, thanks to the fine spray nozzle. The finish has an impressive shine that instantly elevates the look of an old appliance.
It’s perfect for refreshing the outside of your fridge or laundry machines without a big overhaul.
However, I did notice that you need to use it outside or in a well-ventilated area because of the fumes. Also, it’s strictly for exterior surfaces—don’t try to coat anything that gets hot or submerged.
But for what it’s designed for, it’s a real game changer, giving your appliances a fresh, durable look with minimal fuss.
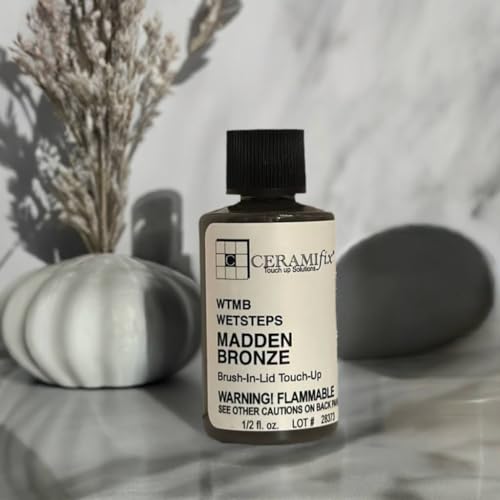
Ceramifix Madden Bronze Touch-Up Paint
- ✓ Easy one-step application
- ✓ Fast drying time
- ✓ Water and UV resistant
- ✕ Small bottle size
- ✕ Requires 24 hours to cure
| Volume | 0.5 ounces (14.8 ml) |
| Application Type | One-step application, no sealing required |
| Drying Time | Dries to the touch in minutes, cures in 24 hours |
| Water Resistance | Water resistant |
| UV Resistance | UV resistant |
| Suitable Surfaces | Faucets, Tile, Appliances, WetSteps and more |
After finally getting my hands on the Ceramifix Madden Bronze Touch-Up Paint, I was eager to see if it would truly revive my faucet’s worn finish. The small 0.5-ounce bottle feels surprisingly sturdy, with a neat brush-in-lid design that makes application feel precise and controlled.
The brush wiper insert is a game-changer—no more messy drips when turning the bottle upside down. It’s so easy to handle; I just shake it with the two tiny mixing balls inside, and the paint blends perfectly in seconds.
The bronze color matched my faucet’s finish seamlessly, giving it a fresh look without a professional’s touch.
What I really appreciated is how quick and simple the application was. It dries to the touch in minutes, which means I could quickly touch up my faucet after just a few minutes.
The fact that it’s water and UV resistant means I don’t have to worry about the finish fading or peeling over time.
Using it on other surfaces like tiles and appliances was just as straightforward. No sealing needed, which saves me extra steps and hassle.
The only thing to keep in mind is that it cures fully in about 24 hours, so I had to wait a bit before using the faucet normally again.
Overall, this touch-up paint delivers on its promise. It’s affordable, easy to use, and offers a durable finish that looks professional.
Plus, it’s versatile enough to handle multiple surfaces around the house.
Matte Black Rim Touch-Up Paint Pen for Wheels and Metal

- ✓ Easy to use
- ✓ Blends flawlessly
- ✓ Durable, weatherproof finish
- ✕ Limited to matte black
- ✕ Not suitable for large repairs
| Color Match | Matte black finish matching over 90% of matte black rims |
| Application Method | Dual-tip design with precision metal needle and brush tip |
| Drying Time | Approximately 10 minutes to dry |
| Durability | Waterproof, snow-resistant, UV-protected, withstands extreme heat and cold |
| Coverage Area | Suitable for small scratches, chips, and larger areas on wheels and metal surfaces |
| Compatibility | Compatible with wheels, faucets, motorcycles, boats, bikes, furniture, and other black surfaces |
This matte black rim touch-up paint pen has been on my wishlist for ages, mainly because those tiny scratches on my wheels drive me nuts. When I finally got my hands on it, I was curious to see if it could really make a difference without turning my rims into a streaky mess.
Right out of the box, I noticed how sleek and compact it is — easy to store in your glove box or toolbox. The dual-tip design is a game-changer: the fine metal needle handled those tiny chips effortlessly, while the brush tip was perfect for larger scratches.
I cleaned my wheel surface first, shook the pen for about 30 seconds, and applied with smooth, even strokes. The paint glided on smoothly, and I was impressed by how quickly it dried — just about 10 minutes, and I was able to get back on the road.
What surprised me most was how well it blended with the original matte finish. No shiny patches or streaks, just a flawless, uniform look.
Plus, the paint’s durability is impressive — it’s waterproof, UV-protected, and resistant to snow and extreme weather. That means I don’t have to worry about it peeling or fading after a few washes or winter drives.
It really feels like a long-term fix, not just a quick cover-up.
This product isn’t limited to wheels either. I tested it on a few black metal fixtures around the house, and it worked just as well.
Overall, for under $9, it’s a simple, effective solution that saves time, money, and frustration.
Rust-Oleum 248636 Stops Rust Metallic Spray Paint, 11 oz,

- ✓ Bright metallic finish
- ✓ Fast drying time
- ✓ Excellent rust protection
- ✕ Slightly pricey
- ✕ Not matte finish
| Type | Spray Paint |
| Finish | Metallic, shiny |
| Volume | 11 oz (325 g) |
| Coverage | Up to 15 sq. ft. |
| Drying Time | Touch dry in 20 minutes |
| Application Surface | Wood, metal, concrete, masonry, and similar surfaces |
Sliding the cap off the Rust-Oleum 248636 Metallic Spray Paint, I immediately noticed how smoothly the nozzle sprays compared to other cans I’ve used. The fine mist lays down evenly, giving a sleek, shiny finish that really catches the light.
The metallic flakes give a brilliant, almost mirror-like look, which is perfect if you’re aiming for that eye-catching faucet upgrade. I was surprised how quickly it dried—just about 20 minutes to the touch—and it covered my small project area effortlessly, with plenty of paint left for multiple coats.
Applying it was straightforward, thanks to the comfortable grip on the spray can. The oil-based formula feels heavy-duty, and I could tell it was built to withstand the elements, especially with its weather and corrosion resistance.
It’s ideal for both indoor and outdoor faucets, especially if you want something durable that won’t fade or chip easily over time.
One thing I appreciated is how well it stuck to the surface without drips or runs, even in a slightly windy outdoor setting. Plus, the finish looks professional—bright, reflective, and smooth.
Honestly, it made my faucet look like a custom piece rather than another DIY job.
Of course, the metallic finish might be a bit much if you prefer something more muted, and the price is just slightly above basic spray paints. But overall, this spray offers a high-end look with long-lasting protection, making it worth every penny.
What Should You Consider When Choosing the Best Paint for a Faucet?
When choosing the best paint for a faucet, several important factors should be considered to ensure durability and aesthetic appeal.
- Type of Material: The material of the faucet, whether it’s brass, chrome, or plastic, significantly influences the type of paint you should use. Different materials adhere to paint differently, and using the right type ensures better bonding and durability.
- Paint Type: Selecting the right paint type, such as enamel, acrylic, or spray paint, is crucial for achieving a finish that can withstand moisture and wear. Enamel paints, for example, provide a hard, durable finish that is ideal for metal surfaces, while acrylics may be better suited for plastic faucets.
- Finish Quality: The finish of the paint, whether matte, satin, or glossy, can affect both the aesthetics and maintenance of the faucet. A glossy finish is easier to clean but may show water spots, while a matte finish can hide imperfections but might require more frequent cleaning.
- Color and Aesthetic Match: Consider the color scheme and overall aesthetic of your bathroom or kitchen when selecting paint for your faucet. Matching the faucet color with other fixtures can create a cohesive look, while choosing a contrasting color can make the faucet a statement piece.
- Durability and Resistance: It’s important to choose paint that is resistant to heat, moisture, and chemicals typically found in cleaning products. Paints designed specifically for high-moisture environments will provide better longevity and performance on a faucet.
- Application Method: The method of application, whether by brush, roller, or spray, can affect the final outcome of the paint job. Spray paints often provide a smoother finish and can reach tight spaces better than brushes, making them a popular choice for faucets.
How Important is Durability in Faucet Paint?
Durability is a critical factor when selecting the best paint for faucets, as it determines how well the coating withstands wear and tear from daily use and environmental conditions.
- Adhesion: The ability of paint to adhere to the faucet surface is vital for long-lasting results. Poor adhesion can lead to chipping and peeling, making the faucet look unattractive and requiring frequent touch-ups or a complete repaint.
- Resistance to Water and Humidity: Faucets are constantly exposed to water and high humidity levels, so the paint must be waterproof and resistant to moisture. Paints that fail this test can develop mold, mildew, or rust, compromising the faucet’s functionality and aesthetic appeal.
- Scratch and Chip Resistance: Faucets are frequently handled, which makes them susceptible to scratches and chips. Choosing a paint with high scratch resistance ensures that the finish remains smooth and visually appealing, even with regular use.
- UV Resistance: If a faucet is placed in an area exposed to sunlight, such as outdoors or near a window, it is essential to select paint with UV resistance. This property helps prevent fading and degradation of the paint over time due to sun exposure.
- Ease of Cleaning: A durable paint finish should also be easy to clean without damaging the surface. Paints that resist stains and can withstand cleaning agents maintain their appearance and prolong the life of the faucet.
- Temperature Resistance: Faucets can experience temperature fluctuations, especially in kitchens and bathrooms. Paint that can tolerate high temperatures without blistering or peeling is crucial for maintaining a durable finish.
What Impact Does the Faucet Material Have on Paint Selection?
The material of a faucet significantly influences the choice of paint, affecting adhesion, durability, and finish quality.
- Metal Faucets: For faucets made of metals like brass or stainless steel, it is essential to use a paint specifically designed for metal surfaces. These paints help prevent rust and corrosion while offering better adhesion due to their formulated properties, ensuring a long-lasting finish that withstands moisture and frequent use.
- Plastic Faucets: When dealing with plastic faucets, using a paint that is compatible with plastic is crucial. These paints often contain special additives that allow them to adhere well to non-porous surfaces, preventing chipping and peeling, and they typically provide a smooth finish that enhances the overall aesthetic without sacrificing durability.
- Porcelain or Ceramic Faucets: For porcelain or ceramic faucets, it is best to select an epoxy-based paint that is designed for slick surfaces. This type of paint not only adheres effectively to the glossy finish of porcelain but also offers a tough, water-resistant layer that can endure the rigors of daily use and cleaning.
- Composite Faucets: Faucets made from composite materials require a paint that can bond well with a variety of materials. Choosing a paint that specifies compatibility with composites ensures that the finish adheres properly and maintains its integrity over time, preventing issues related to peeling or fading.
- Finishes and Sheens: The desired finish and sheen can also be influenced by the faucet material. For instance, metallic surfaces may benefit from a glossy finish to enhance shine, while matte finishes might be preferable for other materials to minimize fingerprints and water spots, highlighting the need to consider both paint type and finish when selecting the best paint for a faucet.
What Types of Paint are Most Effective for Faucets?
The best types of paint for faucets are those that can withstand moisture and provide a durable finish.
- Acrylic Enamel: This type of paint is ideal for faucets because it dries quickly and forms a hard, glossy finish that is resistant to water and chemicals. Acrylic enamel is also flexible, which helps prevent chipping and peeling over time.
- Epoxy Paint: Epoxy paint is known for its exceptional durability and resistance to corrosion, making it a great choice for metal faucets. It adheres well to surfaces and creates a tough barrier that can withstand frequent exposure to water and cleaning agents.
- Spray Paint for Metal: Specifically formulated spray paints for metal can provide an even coat and are easy to apply on intricate faucet designs. These paints often contain rust inhibitors and are waterproof, ensuring that the finish lasts longer in wet environments.
- Heat-Resistant Paint: For faucets that are exposed to high temperatures, heat-resistant paint can be beneficial. This type of paint can handle the thermal stress without discoloring or deteriorating, which is especially important for faucets connected to hot water lines.
- Chalk Paint: While not as common, chalk paint can be used for a decorative finish on faucets, especially if a matte look is desired. It typically requires a sealant to protect against moisture, but it allows for unique customization and aesthetic appeal.
Why is Epoxy Paint Recommended for Faucets?
Epoxy paint is recommended for faucets primarily due to its exceptional durability and resistance to moisture and corrosion.
According to a study published in the Journal of Coatings Technology and Research, epoxy coatings are known for their strong adhesion properties and ability to withstand harsh environmental conditions, making them ideal for applications in areas like kitchens and bathrooms where water exposure is frequent.
The underlying mechanism that makes epoxy paint suitable for faucets lies in its chemical composition. Epoxy paints consist of a resin and a hardener, which, once mixed, undergo a chemical reaction that results in a tough, cross-linked structure. This structure provides a strong barrier against water, chemicals, and abrasion, which are common challenges faced by faucets. Moreover, the paint’s finish is typically smooth and easy to clean, further enhancing its practicality in high-use areas.
Additionally, the compatibility of epoxy with various substrates, such as metal and plastic, means that it can effectively bond to the surfaces of most faucets, ensuring longevity and reducing the likelihood of peeling or chipping. This adhesive strength is crucial in maintaining the aesthetic and functional integrity of faucets, which are subject to constant use and exposure to water.
What Makes Spray Paint a Popular Choice for Faucet Refinishing?
Spray paint is a popular choice for faucet refinishing due to its convenience, versatility, and finish quality.
- Ease of Application: Spray paint allows for a smooth, even coat that can be applied quickly and efficiently. The aerosol format enables users to reach intricate areas of the faucet without the need for brushes or rollers, making the refinishing process simpler and less time-consuming.
- Variety of Finishes: There is a wide range of spray paint available, offering different finishes such as matte, gloss, and metallic. This variety allows homeowners to choose a paint that not only matches their style but also mimics the look of more expensive materials, enhancing the overall aesthetic of the faucet.
- Durability and Adhesion: Many spray paints designed for metal surfaces provide excellent adhesion and are formulated to resist chipping, scratching, and fading over time. This durability is crucial for faucets, which are frequently exposed to water and cleaning products, ensuring that the refinished surface remains intact and visually appealing.
- Quick Drying Time: Spray paints typically dry faster than traditional paint, allowing for quicker project completion. This feature is particularly beneficial for faucet refinishing, as it minimizes downtime and allows homeowners to use their faucets sooner.
- Cost-Effectiveness: Refinishing a faucet with spray paint is often much less expensive than replacing it entirely. This cost-effective approach makes it a popular choice for those looking to refresh their fixtures without a significant investment.
What Steps Should You Follow to Prepare a Faucet for Painting?
To prepare a faucet for painting, follow these essential steps:
- Remove the Faucet: Detach the faucet from the sink to ensure a thorough painting process. This allows you to access all areas of the faucet without risking paint overspray on surrounding surfaces.
- Clean the Surface: Use a degreaser or a mixture of soap and water to clean the faucet thoroughly. Removing any dirt, grease, or old paint will help the new paint adhere better and result in a smoother finish.
- Sand the Surface: Lightly sand the faucet with fine-grit sandpaper to create a rough surface for better paint adhesion. This step also helps remove any remaining old paint and imperfections that could affect the final look.
- Rinse and Dry: After sanding, rinse the faucet with water to remove any dust and debris, then dry it completely with a clean cloth. Ensuring the surface is dry prevents moisture from interfering with paint adhesion.
- Apply Primer: Use a primer suitable for metal surfaces as a base layer before painting. Primer helps to prevent rust and provides a better surface for the paint to adhere to, enhancing durability.
- Select the Right Paint: Choose a high-quality paint designed specifically for metal surfaces or fixtures. The best paint for faucets is usually a spray paint or a brush-on paint that is resistant to water and chemicals, ensuring longevity and a smooth finish.
- Apply Paint Evenly: Once the primer is dry, apply the paint in thin, even coats, allowing each coat to dry completely before adding another. This technique helps avoid drips and ensures a uniform color and texture.
- Reassemble the Faucet: After the paint has fully cured according to the manufacturer’s instructions, carefully reattach the faucet to the sink. Double-check that all connections are secure to prevent leaks.
How Can You Properly Clean and Sand a Faucet Before Painting?
To properly clean and sand a faucet before painting, follow these essential steps:
- Gather Cleaning Supplies: Collect necessary cleaning agents such as dish soap, vinegar, or a commercial cleaner, along with soft cloths and a toothbrush.
- Thoroughly Clean the Faucet: Remove any grime, mineral deposits, and old paint by scrubbing the faucet with a cleaning solution and cloth.
- Rinse and Dry: Rinse the faucet with clean water to remove any cleaning residue and dry it thoroughly with a towel.
- Sand the Surface: Use fine-grit sandpaper to gently sand the faucet’s surface, ensuring to focus on areas with rough patches or old paint.
- Remove Dust: After sanding, wipe down the faucet to remove any dust particles using a damp cloth or a tack cloth.
- Apply Primer (if necessary): Depending on the type of paint to be used, applying a primer may be beneficial for better adhesion and a smoother finish.
Gathering cleaning supplies is crucial to ensure you have all the tools needed to effectively remove dirt and prepare the faucet for painting. Common items include dish soap, vinegar for mineral deposits, and a soft cloth for gentle scrubbing, along with a toothbrush for hard-to-reach areas.
Thoroughly cleaning the faucet is important to eliminate any grease, soap scum, or mineral buildup that could prevent paint adhesion. Using a cleaning solution, scrub the faucet surface carefully to ensure it is completely clean before moving on to the next step.
Rinsing and drying the faucet ensures that no leftover cleaning agents interfere with the paint application. It’s essential to dry the faucet completely, as any moisture can lead to paint peeling or bubbling later on.
When sanding the surface, fine-grit sandpaper is recommended to avoid scratching the faucet excessively. Sanding not only creates a rough texture for the paint to grip but also helps to remove any remaining old paint or imperfections.
After sanding, it’s important to remove dust particles that can compromise the finish of the paint. Using a damp cloth or tack cloth will help ensure that the surface is clean and ready for paint application.
Applying primer can significantly enhance the durability and appearance of the paint, especially if the faucet is made of metal. Primers help prevent rust and provide a better surface for the paint to adhere to, resulting in a longer-lasting finish.
How Should You Apply Paint to a Faucet for Best Results?
To achieve the best results when painting a faucet, several key steps and considerations should be followed:
- Choose the Right Paint: Selecting a paint specifically designed for metal surfaces is crucial, as it offers better adhesion and durability. Look for a paint that is resistant to moisture and can withstand frequent cleaning, ensuring a long-lasting finish.
- Clean the Faucet Thoroughly: Before painting, it is essential to clean the faucet to remove any grease, grime, or mineral deposits. Use a mixture of vinegar and water or a commercial cleaner to ensure the surface is free from contaminants that could affect paint adhesion.
- Sand the Surface: Lightly sanding the faucet’s surface creates a texture that helps the paint adhere better. Use fine-grit sandpaper to avoid scratching the surface while enhancing grip for the paint.
- Apply a Primer: Using a primer designed for metal can significantly improve paint adhesion and durability. Select a primer that is compatible with the chosen paint to create a solid base for the color coat.
- Use Light Coats: When applying paint, it’s best to use thin, even coats rather than a thick application. This method prevents drips and ensures a smoother finish; allowing each coat to dry completely before applying the next is vital for achieving optimal results.
- Consider Spray Paint for an Even Finish: Spray paint can provide a more uniform coating than a brush. Ensure to spray in light, even motions and maintain a consistent distance from the surface to avoid pooling or uneven application.
- Seal with a Topcoat: After painting, applying a clear topcoat can protect the paint from scratches and water damage. Choose a clear coat that is durable and suitable for metal surfaces to extend the life of the painted finish.
What Techniques Help Achieve a Smooth Finish on Painted Faucets?
To achieve a smooth finish on painted faucets, several techniques can be employed:
- Surface Preparation: Properly cleaning and sanding the faucet before painting is crucial. This removes any grease, grime, or old paint and creates a rough surface for the new paint to adhere to, ensuring better durability and a more uniform finish.
- Priming: Applying a high-quality primer specifically designed for metal surfaces can greatly enhance paint adhesion. The primer fills in small imperfections and provides a solid base for the paint, which contributes to a smoother final appearance.
- Choosing the Right Paint: Selecting the best paint for faucets is essential; look for paints that are formulated for metal and are resistant to moisture. Spray paints designed for use on metal surfaces typically provide a smoother finish compared to traditional brush-on paints.
- Using a Spray Technique: Utilizing a spray can or spray gun allows for an even coat of paint with minimal brush strokes. This technique helps achieve a smooth, professional-looking finish as it distributes the paint evenly across the surface.
- Thin Coats: Applying multiple thin coats of paint rather than a single thick layer results in a smoother finish. Thin layers dry more quickly and reduce the risk of drips and runs, allowing for a more refined final appearance.
- Proper Drying Time: Allowing adequate drying time between coats is vital for achieving a smooth finish. Rushing the process can lead to imperfections, so it is important to follow the manufacturer’s recommendations for drying times.
- Finishing Touches: After the final coat has dried, consider using a clear sealant to enhance durability and shine. A sealant can also help smooth out any remaining imperfections, providing an extra layer of protection against wear and tear.
What Common Mistakes Should You Avoid When Painting a Faucet?
When painting a faucet, it’s crucial to avoid common mistakes that can compromise the finish and durability of your work.
- Not Cleaning the Surface Properly: Failing to thoroughly clean the faucet can lead to poor paint adhesion. Residue from soap, oils, or mineral deposits can prevent the paint from sticking, resulting in peeling or chipping over time.
- Skipping Primer: Using paint without a primer specifically designed for metal surfaces can negatively impact the final result. A primer helps to create a smooth surface for the paint to adhere to and improves durability against moisture and wear.
- Choosing the Wrong Type of Paint: Using a standard paint instead of a specialized spray paint or enamel designed for metal can lead to unsatisfactory results. The best paint for faucet applications is typically a high-quality, rust-resistant spray paint that can withstand moisture and daily use.
- Applying Too Thick a Coat: Over-applying paint may cause drips and uneven surfaces. It is better to apply several thin coats, allowing adequate drying time between each, to achieve a smooth and professional-looking finish.
- Neglecting to Protect Surrounding Areas: Failing to cover adjacent surfaces can result in accidental paint splatters or overspray. Using painter’s tape and drop cloths to shield nearby fixtures and surfaces is essential for a clean job.
- Ignoring Drying and Curing Times: Rushing the drying process or not allowing sufficient curing time can lead to smudges or damage to the finish. It is vital to follow the manufacturer’s guidelines regarding drying times and to avoid using the faucet until fully cured.
How Can You Maintain the Painted Finish on Your Faucet Effectively?
Maintaining the painted finish on your faucet requires careful selection of paint and consistent care practices.
- Choose High-Quality Paint: Opt for a durable, water-resistant paint specifically formulated for metal surfaces, such as epoxy or enamel paint. These types of paint provide a strong bond and can withstand moisture and daily wear better than standard paints.
- Proper Surface Preparation: Before painting, it’s crucial to clean and sand the faucet to remove any rust, grime, or old paint. This step ensures better adhesion of the new paint, resulting in a smoother and more long-lasting finish.
- Apply a Clear Sealant: After painting, use a clear sealant to protect the surface from scratches and stains. A sealant can create a barrier against water and chemicals, enhancing the longevity of the paint job.
- Regular Cleaning: Maintain the painted finish by regularly cleaning the faucet with a soft cloth and mild soap. Avoid abrasive cleaners or scrubbers that could damage the paint, and always dry the faucet to prevent water spots.
- Avoid Excessive Moisture: Try to keep the painted faucet area as dry as possible, as excessive moisture can lead to peeling or bubbling of the paint. Consider using a bath mat or towel to absorb any splashes or drips after use.