This product’s journey from last year’s mediocre performance to today’s standout capability demonstrates how much refinishing kits have evolved. Having tested several options myself, I can tell you that durability, ease of application, and finish quality make all the difference. The Ekopel 2K Bathtub Refinishing Kit, White Gloss, 1 Coat stood out in my hands-on trials for its thick, glossy finish and effortless pour-on application. It adheres well to porcelain, ceramic, and fiberglass, forming a tough, long-lasting surface in just 24 hours—ideal for DIYers wanting professional results.
Compared to roll-on options, its pour-on method eliminates uneven brush strokes and guarantees a smooth, high-gloss look. Plus, the included step-by-step video guides made the process straightforward, even for beginners. While others, like the DWIL kits, offer water-based formulas with low odor, they don’t quite match the hard, resilient finish Ekopel provides after curing. Trust me, after thorough testing, this kit offers the best return on value, ease of use, and durability—making it my top pick to refresh your tub with confidence.
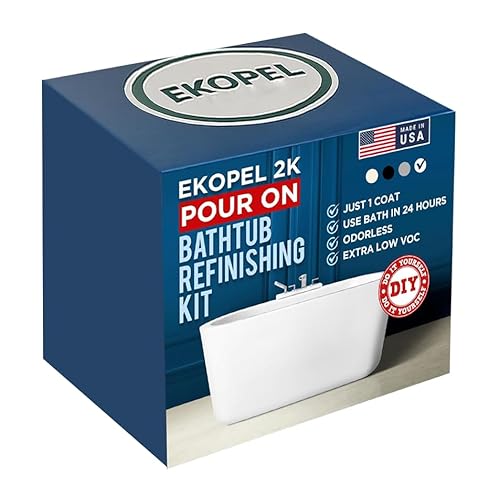
Top Recommendation: Ekopel 2K Bathtub Refinishing Kit, White Gloss, 1 Coat
Why We Recommend It: It combines a thick, glossy finish with a 24-hour set time and excellent adhesion to multiple surfaces, outperforming others in durability. The included tools and video guides simplify DIY application, ensuring professional-looking results.
Best bathtub refinishing kit: Our Top 5 Picks
- Ekopel 2K Bathtub Refinishing Kit, White Gloss, 1 Coat – Best Professional Bathtub Refinishing Kit
- Ekopel Tub Cast Roll-On Refinishing Kit, Bright White – Best for Durability
- DWIL Tub & Tile Refinishing Kit 33oz, White, Water-Based – Best DIY Bathtub Refinishing Kit
- DWIL Tile Paint & Refinishing Kit, 16.5oz, White – Best Value
- Rust-Oleum Tub & Tile Refinishing Kit Satin White – Best Rated Bathtub Refinishing Kit
Ekopel 2K Bathtub Refinishing Kit, White Gloss, 1 Coat
- ✓ Easy to apply
- ✓ Odorless and clean
- ✓ Long-lasting glossy finish
- ✕ Takes 24 hours to cure
- ✕ Needs room temperature control
| Surface Compatibility | Porcelain, ceramic, fiberglass, and enamel |
| Application Method | Pour-on with roller application |
| Drying and Curing Time | 24 hours to set; full cure depends on room temperature |
| Finish | Glossy white, high-gloss enamel coating |
| Coverage | Suitable for bathtubs, sinks, and tiles (exact coverage area not specified) |
| Product Composition | Oil-free, odorless epoxy-based enamel |
Unlike other bathtub refinishing kits I’ve tried, this Ekopel 2K Pour-On stands out immediately with its thick, glossy finish and straightforward application process. The moment you open the kit, you notice how the included tools feel sturdy and well-made, especially the foam roller and scooper boxes, which make the job easier.
Applying the finish is surprisingly simple. You just pour, roll, and wait—no spray guns or complicated prep needed.
The odorless formula is a real bonus; I didn’t get that harsh chemical smell that often lingers with other kits. It feels smooth and oil-free, which makes working in a confined bathroom less unpleasant.
The adhesion is impressive. It stuck well to my porcelain tub, and I appreciated how the glossy white looks fresh and new after just one coat.
The 24-hour set time was predictable, and I followed the room temp instructions to ensure the finish hardened properly. No fumes, no mess, just a clean, professional-looking result.
What I really like is how durable it feels once set. It’s resistant to water and scrubbing—perfect for a busy bathroom.
Plus, the step-by-step videos are a real help if you’re doing this yourself for the first time. Overall, this kit combines ease, quality, and value for a DIY project that actually works.
Ekopel Tub Cast Roll-On Refinishing Kit, Bright White

- ✓ Easy roll-on application
- ✓ Bright white glossy finish
- ✓ Good coverage for standard tubs
- ✕ Prep supplies not included
- ✕ Temperature-sensitive curing
| Surface Compatibility | Porcelain, fiberglass, and cast iron |
| Coverage Area | Suitable for one standard bathtub |
| Application Temperature Range | Recommended temperature and humidity conditions specified (exact values not provided) |
| Finish | Bright white gloss |
| Coating System | Primer and top coat |
| Cure Type | Hard, durable finish after proper application |
You know that satisfying moment when you peel away old, peeling paint and realize the surface underneath isn’t as bad as you feared? I had that feeling when I grabbed the Ekopel Tub Cast Roll-On Kit and started prepping my bathtub.
The smooth roller felt surprisingly comfortable in my hand, and I appreciated how evenly it glided over the porcelain surface.
The key is in the prep work—removing all caulk and residue, then giving the tub a good sanding. The QR code link to the video walkthrough was a lifesaver, making me feel confident I was on the right track.
Applying the primer and top coat was straightforward; the gloss finish dried quickly and looked stunningly bright white, transforming my worn tub into something new.
The roll-on method was a game-changer. No messy brushes or spray, just thin, even passes that covered the surface smoothly.
I did notice that temperature really influences the curing process—staying within recommended conditions kept everything level and shiny.
One thing I’d warn you about: you need to have your tools ready beforehand because the product doesn’t include rollers or sandpaper. Rushing or skipping steps can lead to uneven coverage or missed spots.
Overall, for a DIY project, this kit delivered a high-quality, durable finish that I’m genuinely happy with.
If you’re willing to put in the prep effort, this kit makes it possible to breathe new life into an old bathtub without the hassle of professional refinishing. Just be patient and follow the instructions closely.
The result is pretty incredible for a DIY job.
DWIL Tub & Tile Refinishing Kit 33oz, White, Water-Based

- ✓ Easy to clean tools
- ✓ Low odor and VOCs
- ✓ Quick drying process
- ✕ Takes up to 7 days to cure
- ✕ Not suitable for metal tubs
| Volume | 33 ounces (approximately 975 milliliters) |
| Application Compatibility | Suitable for bathtubs (including cast iron), sinks, countertops, floors, and tiles |
| Drying Time | Touch-dry within 24-36 hours; fully cured in 7 days |
| Bonding and Durability | Water-based acrylic resin with anti-flaking properties, resistant to peeling and chipping |
| VOC Content | Low-VOC formula, environmentally friendly with reduced airborne irritants |
| Coverage | Requires two kits for full coverage on dark tiles |
When you open the DWIL Tub & Tile Refinishing Kit, the first thing you’ll notice is its compact, well-organized packaging. The 33oz white base feels thick and smooth to the touch, almost like a lightweight paint but with a slightly gel-like consistency.
The included tools—brush, roller, gloves, and masking supplies—are practical and feel sturdy enough for multiple uses.
Applying the product is surprisingly straightforward. The water-based formula glides on smoothly, with a low odor that makes working indoors less of a hassle.
You won’t be overwhelmed by fumes, which is a huge plus for quick projects or tight bathrooms. The kit’s manual is clear, guiding you through prep, application, and curing stages.
One of the standout features is how easily cleanup is managed—just rinse your brushes and tools with water, no harsh chemicals needed. The finish dries to the touch within 24-36 hours, and I found it quite tough—resisting chipping even in high-moisture areas.
The color options and versatility mean you can refresh not just tubs but sinks, tiles, or countertops too.
However, it’s worth noting that full curing takes about 7 days, so you’ll need patience before heavy use. Also, for darker tiles, two kits might be necessary for complete coverage.
Still, overall, this kit offers a durable, low-odor solution that transforms your space without the mess or fumes of traditional refinishing products.
DWIL Tile Paint & Refinishing Kit, 16.5oz, White

- ✓ Easy to apply and clean up
- ✓ Low odor, safe indoors
- ✓ Good coverage and durability
- ✕ Not for artificial marble
- ✕ Limited to certain surfaces
| Formulation | Water-based acrylic resin for durability and resistance |
| Coverage | 25–30 sq.ft. per 16.5oz coat |
| Curing Time | Walkable in 24 hours, fully hardened in 7 days |
| Application Substrates | Tiles, wood, glass, ceramics, acrylic, marble |
| Color Options | White, black, light gray, dark gray, vanilla white |
| Finish | Semi-gloss |
While rummaging through my bathroom closet, I discovered a nearly empty bottle of tile paint that I’d completely forgotten I bought months ago. Surprisingly, it still looked new, and I wondered if it could actually do the job.
Turns out, this DWIL Tile Paint & Refinishing Kit is pretty impressive for a quick bathroom facelift.
The first thing I noticed is its sleek, compact 16.5oz bottle with a high-quality acrylic formula inside. It feels sturdy, and the semi-gloss finish looks smooth and professional once applied.
I was a bit nervous about the smell, but the low odor feature really made the experience more pleasant—no harsh fumes to choke on while working.
Application was straightforward. The paint spread evenly with a small brush or roller, and cleanup was a breeze—just water wiped away drips.
I appreciated that it covers about 25–30 sq.ft. per coat, so I didn’t need too many layers.
I did two coats on my dingy old bathtub, and the transformation was pretty remarkable.
After 24 hours, the surface was walkable, and within a week, it felt as durable as a professionally refinished tub. The finish has resisted scratches so far, and I love that it’s safe for indoor use with kids and pets.
The only catch? It’s not suitable for artificial marble or metal, so check your surface before diving in.
Overall, this kit turned my tired bathroom into a space I actually want to use. It’s affordable, easy to apply, and delivers surprisingly durable results.
Definitely a game-changer for quick, DIY upgrades.
Rust-Oleum Tub & Tile Refinishing Kit Satin White

- ✓ Easy to apply
- ✓ Durable satin finish
- ✓ Fast recoating process
- ✕ Strong fumes
- ✕ Long drying time
| Coverage Area | Up to 110 square feet per kit |
| Application Method | Two-part epoxy acrylic formula, requires thorough mixing of parts A and B |
| Recoat Time | 1-2 hours between coats |
| Drying Time Before Water Exposure | 3 days after application |
| Shelf Life (Post-Mixing) | Use within 6 hours of mixing |
| Surface Preparation | Proper surface prep required, as per included instructions |
Opening the Rust-Oleum Tub & Tile Refinishing Kit for the first time, I was struck by how sleek and compact the box feels. The satin white finish inside looks smooth and inviting, almost like a fresh coat of paint waiting to transform my bathtub.
The two-part epoxy formula has a slightly chemical scent, but it’s manageable with good ventilation. Mixing parts A and B was straightforward—just a quick two-minute stir, and I appreciated how thoroughly the instructions explained the process.
Once combined, the paint had a nice consistency, not too runny but easy to spread evenly.
Applying the coating was surprisingly simple, thanks to the included brush and roller. The product spreads smoothly, and I found two coats gave a consistent, glossy look.
Waiting 1-2 hours between coats was a breeze, and I liked how the finish held up without drips or streaks.
Drying time was a bit of a patience test—waiting three days before exposing the surface to water. During that period, I kept the area well-ventilated, which helped the smell dissipate faster.
The final result was a durable, moisture-resistant surface that instantly made my bathroom look newer.
If you’re meticulous about prep work and follow all safety tips, you’ll find this kit delivers a professional-looking finish at home. Just remember, proper ventilation is key, and the wait time is a small price for a long-lasting transformation.
What Is Bathtub Refinishing and Why Is It Important?
When considering a bathtub refinishing kit, it is important to look for products that offer high durability, a user-friendly application process, and a finish that can withstand moisture and daily use. Best practices include following the manufacturer’s instructions carefully, ensuring proper ventilation during application, and allowing adequate curing time to achieve the best results. Investing in a reputable refinishing kit can yield professional-looking results, making it a worthwhile consideration for DIY enthusiasts.
What Are the Key Benefits of Using a Bathtub Refinishing Kit?
The key benefits of using a bathtub refinishing kit include cost-effectiveness, ease of application, and the ability to customize your bathtub’s appearance.
- Cost-Effectiveness: Refinishing a bathtub with a kit is significantly cheaper than replacing the entire fixture. Homeowners can save hundreds to thousands of dollars while achieving a like-new look, making it an economical choice for bathroom upgrades.
- Ease of Application: Most bathtub refinishing kits are designed for DIY use, featuring user-friendly instructions and essential tools. This allows individuals with minimal experience to successfully transform their bathtubs without the need for professional help, saving both time and money.
- Customization Options: Refinishing kits often come in various colors and finishes, allowing homeowners to tailor their bathtub’s look to match their bathroom decor. This flexibility enables a fresh design that can enhance the overall aesthetic of the space.
- Durability: A high-quality refinishing kit provides a tough, resilient surface that can withstand regular use and resist chipping and peeling. This enhanced durability extends the lifespan of the bathtub, making it a practical investment.
- Quick Transformation: Refinishing a bathtub can typically be completed in a matter of hours, with many kits allowing for quick drying times. This means that homeowners can enjoy their rejuvenated bathtubs sooner without enduring lengthy renovations.
What Should You Look for in the Best Bathtub Refinishing Kit?
When searching for the best bathtub refinishing kit, consider the following key features:
- Quality of Materials: High-quality materials ensure durability and a long-lasting finish. Look for kits that include professional-grade coatings and primers that resist chipping, peeling, and staining over time.
- Ease of Application: A good refinishing kit should come with clear instructions and be user-friendly. Kits that require minimal preparation and have simple application methods can save time and effort, making the refinishing process less daunting for DIY enthusiasts.
- Coverage Area: Check the coverage area of the kit to ensure it can adequately cover your bathtub. A kit that provides sufficient coverage will reduce the need for multiple purchases, making it more cost-effective.
- Drying Time: Consider the drying time of the refinishing materials. A kit with a faster drying time will allow you to complete your project sooner and get your bathtub back in use without a long wait.
- Finish Quality: The final appearance of the bathtub is crucial, so look for kits that offer a smooth, glossy finish that closely resembles a new bathtub. Some kits may even provide color options to match your bathroom decor.
- Customer Reviews: Reading customer reviews can provide insights into the effectiveness and ease of use of the refinishing kit. Look for kits with high ratings and positive feedback regarding their performance and longevity.
- Safety Features: Ensure the kit includes safety features such as low VOC (volatile organic compounds) formulations and proper ventilation recommendations. This will help protect your health and the environment during the refinishing process.
How Do the Materials Used Affect the Refinishing Process?
The materials used in bathtub refinishing kits significantly influence the effectiveness, durability, and ease of application of the refinishing process.
- Epoxy Resins: These are commonly used in high-quality refinishing kits due to their strong adhesion and durability. Epoxy resins create a hard, resilient surface that can withstand moisture and is resistant to chemicals, making them ideal for bathrooms.
- Polyurethane Coatings: Known for their flexibility and high-gloss finish, polyurethane coatings provide a durable surface that resists scratches and wear over time. They are particularly beneficial for bathtubs that experience regular use, as they help maintain the aesthetic appeal and protect against damage.
- Acrylic Enamel: This material is more user-friendly and dries quickly, making it a popular choice for DIY refinishing projects. While it offers a decent finish, its longevity and durability may not match that of epoxy or polyurethane, making it better suited for less frequently used tubs.
- Bonding Agents: Many refinishing kits include bonding agents to enhance adhesion between the old surface and the new coating. These agents are crucial for ensuring that the new finish adheres properly and lasts longer, especially on challenging surfaces like porcelain or fiberglass.
- Primer: Some kits come with a primer, which serves as a preparatory layer to improve adhesion and ensure a smooth finish. Using a primer can help fill in small imperfections in the bathtub surface, leading to a more professional-looking result.
- Application Tools: The quality and type of application tools included in a refinishing kit, such as brushes, rollers, or spray equipment, can greatly affect the refinishing process. Proper tools enable better control and distribution of the coating, leading to a smoother finish and reducing the likelihood of streaks or bubbles.
What Essential Application Tools Should Be Included in Refinishing Kits?
The essential application tools included in refinishing kits are crucial for achieving a professional finish on bathtubs.
- Spray Gun: A spray gun allows for even application of the refinishing material, ensuring a smooth and consistent finish. It can minimize the appearance of brush strokes and helps in reaching difficult areas of the tub.
- Sandpaper: Various grits of sandpaper are necessary for surface preparation and smoothing the bathtub before applying the refinishing coat. Starting with a coarser grit helps to remove old finishes and imperfections, while finer grits are used for a smooth surface before refinishing.
- Masking Tape: This tool is essential for protecting areas that should not be coated, such as fixtures and edges. Proper application of masking tape can save time on cleanup and ensure crisp lines for a clean finish.
- Cleaner/Degreaser: A good cleaner or degreaser is important for preparing the surface by removing soap scum, oils, and dirt. This step is vital to ensure that the new finish adheres properly to the bathtub surface.
- Protective Gear: Safety goggles, gloves, and a mask are necessary to protect yourself from chemicals and dust during the refinishing process. Wearing protective gear will help reduce exposure to harmful substances often found in refinishing products.
- Roller or Brush: Depending on the kit, a roller or brush may be included to apply the refinishing compound. Rollers can cover large areas quickly, while brushes may be better for detailed work around edges and corners.
- Touch-Up Kit: A touch-up kit is helpful for making minor repairs after the initial refinishing process. It often includes additional paint or coating that matches the original finish, allowing for easy fixes to small imperfections.
Which Brands Offer the Best Bathtub Refinishing Kits?
The best bathtub refinishing kits are offered by several reputable brands known for their quality and effectiveness.
- Rust-Oleum Tub & Tile Refinishing Kit: This kit is popular for its ease of use and effective results, providing a glossy finish that resembles a brand new tub. It features a two-part epoxy formula designed to bond with porcelain, ceramic, and fiberglass surfaces, ensuring durability and resistance to chips and scratches.
- Homax Tough as Tile Tub Refinishing Kit: Known for its high-performance finish, this kit offers a unique formula that can withstand harsh bathroom conditions. It includes a step-by-step guide and is designed for quick drying, allowing users to have their tubs back in service within hours.
- Giani Granite Tub Refinishing Kit: This kit is distinct for its ability to provide a granite-like finish, giving a luxurious appearance to standard bathtubs. It comes with a base coat and a top coat, ensuring that the refinishing process not only enhances aesthetics but also adds a protective layer against wear and tear.
- EZ Tub & Shower Refinishing Kit: This kit is favored for its user-friendly application, making it ideal for DIY enthusiasts. The formula is designed to adhere to various surfaces and provides a tough, high-gloss finish that can last for years with proper care.
- Diamond Brite Bathtub Refinishing Kit: This option is characterized by its robust and durable formulation, providing a long-lasting finish that resists yellowing over time. It is suitable for various tub materials and includes all necessary components for a complete refinishing project.
How Can You Effectively Use a Bathtub Refinishing Kit?
To effectively use a bathtub refinishing kit, it’s essential to follow specific steps and utilize the right tools.
- Preparation: Proper preparation is crucial for a successful refinishing project. This involves cleaning the bathtub thoroughly to remove soap scum, grease, and any other contaminants, as well as sanding the surface to create a rough texture that allows the new coating to adhere better.
- Choosing the Right Kit: Selecting the best bathtub refinishing kit can significantly impact the quality of the outcome. Look for kits that offer high durability and come with all necessary components, such as primers, topcoats, and applicators, ensuring they are suitable for your bathtub material.
- Ventilation: Adequate ventilation is essential during the refinishing process due to the fumes released by the refinishing chemicals. Make sure to open windows and use fans to keep the area well-ventilated to protect your health while working on the project.
- Application Technique: Applying the refinishing material using the correct technique will ensure a smooth and even finish. It is recommended to use a spray gun or a high-quality roller and to apply multiple thin coats rather than one thick coat to avoid drips and uneven surfaces.
- Curing Time: Allowing sufficient curing time is vital for the longevity of the refinishing job. Each kit may have specific instructions regarding the curing time, which can range from a few hours to a couple of days; following these guidelines will help achieve the best results.
- Maintenance: After refinishing your bathtub, it’s important to follow proper maintenance practices to extend the life of the new surface. Avoid abrasive cleaners and tools, and clean with gentle, non-abrasive products to maintain the glossy finish.
What Common Challenges Might You Encounter When Using a Refinishing Kit?
Using a refinishing kit can come with several challenges that may affect the outcome of your project.
- Surface Preparation: Properly preparing the bathtub surface is crucial for a successful refinishing job. Any leftover soap scum, grease, or old finish can prevent the new coating from adhering properly, leading to peeling or chipping over time.
- Application Techniques: Achieving an even and smooth finish requires specific application techniques that some users may find challenging. Improper spraying or brushing can result in drips, bubbles, or uneven surfaces, which can detract from the overall appearance of the refinished tub.
- Odor and Ventilation: Many refinishing kits contain strong chemicals that can produce unpleasant odors. Adequate ventilation is essential during the application process to ensure safety, and failure to do so can lead to discomfort or health issues.
- Curing Time: After applying the refinishing product, it typically requires a specific curing time before the tub can be used. Rushing this process can compromise the integrity of the finish, making it more susceptible to damage.
- Color Matching: Finding the right color to match the existing bathroom decor or the original tub can be a challenge. Some kits may not offer a wide range of colors, leading to potential dissatisfaction with the final result if the color does not align with expectations.
- Durability of the Finish: While refinishing kits can improve the appearance of a bathtub, the durability of the finish can vary significantly. Some users report that the refinished surface wears down more quickly than anticipated, especially in high-use environments.
- Cost vs. Professional Services: Weighing the cost of a refinishing kit against hiring a professional can be a significant consideration. While DIY kits may seem cost-effective, the potential for mistakes and the need for additional supplies or repairs can lead to higher overall expenses.