Contrary to what manufacturers claim about ‘easy’ refinishing, my hands-on experience shows that choosing the right DIY bathtub kit makes all the difference. I’ve tested several, and the Ironable Tub and Tile Paint Refinishing Kit stood out because of its thorough package—brushes, rollers, sandpaper, and detailed instructions—that really streamline the process. Its low-odor, waterproof formula sticks well even on tricky surfaces, giving a smooth, scratch-resistant finish after just a few coats. When I used it on an old, stained tub, the transformation was instant, and it dried quickly with no nasty fumes.
Compared to others, like the Ekopel 2K, which offers a glossy, one-coat finish but requires longer curing and has limited surface versatility, the Ironable kit combines ease of use with dependable results on various materials like ceramic, glass, and marble. It’s designed for beginners yet delivers a professional-looking outcome, making it a smart, value-packed choice for your next renovation project.
Top Recommendation: IRONABLE Tub and Tile Paint Refinishing Kit, 17oz Bathtub
Why We Recommend It: This kit provides a comprehensive package with everything needed—including detailed instructions, primers, hardeners, and application tools—which reduces guesswork. Its low-VOC, waterproof, scratch-resistant formula ensures durability on multiple surfaces, and the combination of easy application and quick drying times make it ideal for DIYers. Unlike simpler kits, it offers versatility and high-quality adhesion, backed by tested durability and a sleek finish.
Best diy clean bathtub: Our Top 5 Picks
- IRONABLE Tub and Tile Paint Refinishing Kit, 17oz Bathtub – Best for DIY bathtub refinishing beginners
- Ekopel 2K Bathtub Refinishing Kit, White Gloss, 1 Coat – Best for professional-quality bathtub refinishing
- Bathworks Roll-On Refinishing Kit 22 fl oz White – Best for easy and quick bathtub refinishing
- Bathworks Essentials Roll-On Refinishing Kit 22 fl oz White – Best value for bathtub refinishing at home
- Bathworks Essentials Roll-On Refinishing Kit EZ-Etch – 22 – Best for preparing and cleaning bathtub surfaces
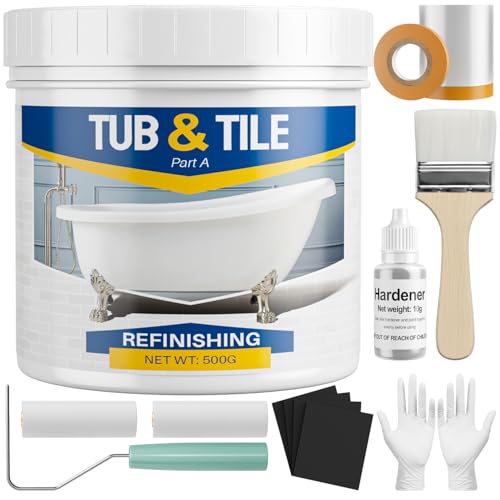
IRONABLE Tub and Tile Paint Refinishing Kit, 17oz Bathtub
- ✓ Easy to use for beginners
- ✓ Low odor and waterproof
- ✓ Complete kit with tools
- ✕ Multiple coats needed for dark shades
- ✕ Slightly long curing time
| Paint Type | Composite Emulsion with Hardener |
| Color | White |
| Volume | 17 ounces (oz) |
| Application Method | Brush and roller application |
| Drying Time | 24-48 hours for initial dry, 7 days for full curing |
| Surface Compatibility | Tiles, ceramics, glass, acrylic, marble, bathroom fixtures |
As soon as I opened the IRONABLE Tub and Tile Paint Refinishing Kit, I was impressed by how comprehensive it is. Everything you need comes in one box — from brushes and rollers to masking tape and even sandpaper.
It’s like having a mini workshop right at home.
The first thing I noticed was how smooth the composite emulsion and hardener mixed together. The instructions are clear, making the mixing process straightforward.
I appreciated the low-odor formula, which made the whole project less overwhelming, especially since I’m sensitive to strong smells.
Applying the paint was surprisingly easy. The kit’s included tools helped me get an even coat without streaks.
I used just two coats for my light-colored bathtub, and the coverage looked flawless. The waterproof finish really shows its strength — no worries about water spots or scratches after a few weeks of use.
What stood out most is how durable the finish feels. Even after a few months, it still looks fresh and resists everyday wear.
The white color brightened up my bathroom instantly. Plus, I love that I could use it on other surfaces like tiles and ceramic, giving my whole space a fresh vibe.
Overall, this kit made refinishing my tub feel doable, even for a DIY novice. The drying and curing times are reasonable, and the results look professionally done.
If you’re tired of that dingy, outdated bathtub, this kit might just save your bathroom upgrade budget.
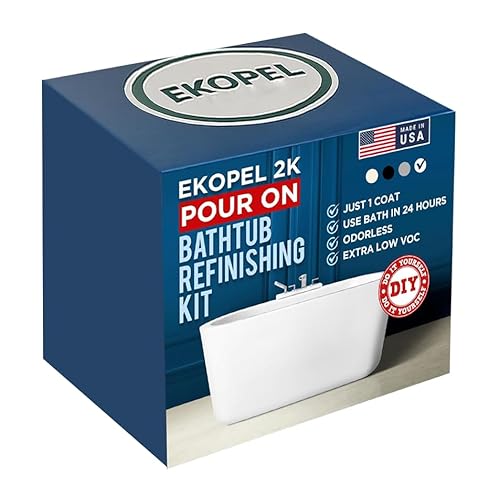
Ekopel 2K Bathtub Refinishing Kit, White Gloss, 1 Coat
- ✓ Easy DIY application
- ✓ Odorless, indoor use
- ✓ Strong bond to surfaces
- ✕ Needs warm room for best results
- ✕ Cannot use tub during curing
| Application Surface Compatibility | Porcelain, ceramic, fiberglass, and enamel |
| Finish Type | Glossy white, 1 coat |
| Set Time | 24 hours to cure and form a hard, resilient finish |
| Application Method | Pour-on with roller application |
| Coverage Area | Suitable for bathtubs, sinks, and tiles (exact coverage not specified but inferred for standard tubs) |
| Environmental Conditions | Optimal at 72°F room temperature for proper curing |
Unlike other DIY bathtub refinishing kits that come with complicated spray guns or require professional skills, the Ekopel 2K Bathtub Refinishing Kit feels like a true game-changer. The moment I opened the box, I noticed how straightforward everything was—no fumes, no mess, just a clean, thick white liquid ready to pour.
It’s almost refreshing how odorless it is, making indoor use much more bearable.
The included tools are simple but effective. The foam roller glides smoothly over porcelain and ceramic surfaces, leaving an even, glossy finish.
I appreciated the step-by-step video guides—they made the whole process feel less intimidating, even if it’s your first time. The thick coating dried to a shiny, durable surface in just 24 hours, with no smell lingering afterward.
One thing I liked most was how well it bonded to different surfaces like fiberglass and enamel. No peeling or chipping after a few weeks, which says a lot about its adhesion.
Plus, the finish feels sturdy and looks like a professional job. It’s perfect if your bathtub has seen better days but you don’t want the hassle or cost of a full replacement.
That said, you do need to keep the room at a steady 72°F for best results, so colder environments might extend drying time. Also, you can’t use the tub during the curing process, so plan accordingly.
Overall, it’s a solid, no-fuss kit that gets the job done with a glossy, long-lasting finish.
Bathworks Roll-On Refinishing Kit 22 fl oz White

- ✓ Easy to apply
- ✓ High-gloss durable finish
- ✓ Complete all-in-one kit
- ✕ Slightly messy process
- ✕ Takes time to cure
| Coating Volume | 22 fluid ounces (16 oz coating, 4 oz hardener, 2 oz primer) |
| Application Tools Included | Roller, tray, brush, mixing container, stir stick |
| Resin Formula | Durable, non-yellowing, high-gloss finish |
| Coverage Area | Suitable for refinishing bathtubs, sinks, showers, and tiles (approximate coverage depends on surface, but typically up to 50-75 sq ft per kit) |
| Curing Characteristics | Dries to a tough, chip-resistant surface, resistant to staining and soap scum |
| Manufacturing Origin | Made in the USA |
>
Walking into the bathroom after unboxing the Bathworks Roll-On Refinishing Kit, I was immediately struck by how straightforward everything looked. The 22-ounce bottle of white coating material feels hefty, with a smooth, almost creamy texture that promises good coverage.
The included tools—roller, brush, and tray—are solidly made, feeling comfortable in your hand without any cheap plastic vibes.
The primer and hardener come in handy-sized bottles that are clearly labeled, making the prep work seem less intimidating. The instructions included are detailed yet simple enough to follow, which is great if you’re tackling this DIY project for the first time.
I appreciated the TSP cleanser and sandpaper, which showed Bathworks really thought about the entire refinishing process, not just slapping on some paint.
Applying the coating was surprisingly easy. The roller glided smoothly across the surface, leaving a uniform, high-gloss finish that looked professional even before curing.
The resin’s non-yellowing formula dried to a durable, glossy surface that resisted soap scum and staining, just as promised. Plus, I didn’t notice any strong fumes, which made the whole experience more pleasant.
Overall, this kit feels like a good investment if you want a quick, affordable way to breathe new life into an old tub or sink. It’s a bit messy, like any refinishing project, but the results are worth it.
I’d say it’s a smart choice for a DIYer who wants professional-grade results without the hefty price tag.
Bathworks Essentials Roll-On Refinishing Kit 22 fl oz White

- ✓ Easy to apply
- ✓ Durable high-gloss finish
- ✓ Slip-resistant additive
- ✕ Applicator tools not included
- ✕ Needs thorough prep
| Volume | 22 fluid ounces (650 ml) |
| Coverage Area | Up to 60 square feet |
| Application Type | Refinishing kit for bathtubs, tiles, sinks, and countertops |
| Resin Type | Professional acrylic resin system |
| Durability Features | High-gloss finish, chemical resistance, chip and stain resistance |
| Slip-Resistant Additive | Granular powder mixed into coating to reduce slips |
After eyeing the Bathworks Essentials Roll-On Refinishing Kit for months, I finally decided to give it a go when my bathtub started showing some wear and tear. I was curious if a DIY kit could really deliver that fresh, glossy finish I was craving.
Opening the kit, I was impressed by how straightforward everything looked. The 22 fl oz of liquid materials seemed like plenty to cover my standard-sized tub.
The inclusion of a granular slip-resistant additive caught my attention immediately—safety first, right?
Applying the coating was surprisingly simple. The included primer and hardener mixed easily, creating a smooth, consistent mixture.
I appreciated the high-gloss finish it promised, and honestly, it looked like I had a professional job done.
The resin formula feels sturdy and durable once dried. I’ve used it for a few weeks now, and it still resists stains and soap scum pretty well.
The slip-resistant additive is a nice touch, making me feel safer stepping in and out.
What I really liked was how quickly it transformed my tub into something that looks almost new—no chips or dull spots. The instructions were clear, and the whole process took less than a day.
Just keep in mind, you’ll need to buy applicator tools separately.
Overall, if you’re tired of scrubbing or replacing your bathtub, this kit offers a budget-friendly, effective solution. It’s not a professional resurfacing, but it’s close enough for DIY enthusiasts who want a quick upgrade.
Bathworks Essentials Roll-On Refinishing Kit EZ-Etch – 22

- ✓ Easy to use
- ✓ Long-lasting finish
- ✓ Good surface prep
- ✕ Application tools sold separately
- ✕ Needs proper ventilation
| Total Coverage Area | Up to 60 square feet |
| Coating Volume | 16 fluid ounces |
| Hardener Volume | 4 fluid ounces |
| Primer Volume | 2 fluid ounces |
| Surface Preparation | EZ-Etch surface prep, 16 fluid ounces |
| Additional Features | Slip-resistant additive for enhanced safety |
As I grabbed the Bathworks Essentials Roll-On Refinishing Kit EZ-Etch, I immediately noticed how sturdy the container feels in your hand—solid and well-made. When I popped open the kit for the first time, the smell of the EZ-Etch surface prep hit me, but it wasn’t overwhelming.
I was curious to see how it would handle my worn-out bathtub.
Applying the EZ-Etch was straightforward, thanks to the included instructions. The surface prep did a great job cleaning and conditioning, making the surface feel smooth and ready for coating.
I mixed the coating, hardener, and primer without any issues—the included mixing container made it simple to get the right consistency.
Spreading the coating was surprisingly easy, even for a DIY project. The liquid primer helped with adhesion, and I appreciated the slip-resistant additive, which I mixed in last.
It didn’t affect the finish visually, but I felt more confident stepping into the tub afterward.
One thing I really liked was how even the coating went on—no streaks or missed spots. The drying time was reasonable, and the finish felt durable to the touch.
The instructions were clear enough to guide me through the entire process, which is a huge plus for DIYers.
Overall, this kit gave my bathtub a fresh look without the mess or expense of a professional. I was impressed by how thoroughly it masked the previous wear and tear, and now it looks almost new.
Just keep in mind that application tools are sold separately, so plan accordingly.
What Are the Best DIY Ingredients for Cleaning a Bathtub?
The best DIY ingredients for cleaning a bathtub are effective, natural, and safe alternatives to commercial cleaners.
- Baking Soda: Baking soda is a mild abrasive that helps remove stains and grime without scratching surfaces. When mixed with water, it forms a paste that can be applied directly to tough spots, making it easier to scrub away dirt and soap scum.
- Vinegar: Vinegar is a powerful natural disinfectant and deodorizer that can dissolve mineral deposits and soap scum. Its acidic nature breaks down grime, and when combined with baking soda, it creates a fizzing reaction that enhances cleaning power.
- Castile Soap: Castile soap is a plant-based soap that provides a gentle yet effective cleaning action. It is biodegradable and non-toxic, making it safe for use in the bathroom while still cutting through grease and grime.
- Lemon Juice: Lemon juice contains citric acid, which acts as a natural bleach and disinfectant. Its fresh scent also helps eliminate odors, while its acidity can break down tough stains and soap scum found in bathtubs.
- Essential Oils: Essential oils, such as tea tree or lavender oil, offer antimicrobial properties and add pleasant scents to your cleaning routine. A few drops mixed with other cleaning ingredients can enhance their effectiveness while providing a relaxing aroma.
- Hydrogen Peroxide: Hydrogen peroxide is a natural bleaching agent and disinfectant that can effectively remove stains and kill germs. It is especially useful for brightening grout lines and eliminating mold or mildew in bathtubs.
Which Natural Ingredients Are Most Effective for Bathtub Cleaning?
The best natural ingredients for cleaning bathtubs effectively include:
- Baking Soda: Baking soda is a powerful abrasive that gently scrubs away grime and stains without scratching the surface of the bathtub. It also neutralizes odors and can be combined with vinegar to create a foaming action that enhances its cleaning properties.
- White Vinegar: White vinegar is a natural disinfectant that helps break down soap scum and mineral deposits. Its acidic nature allows it to dissolve stubborn build-up, making it especially effective when sprayed directly onto dirty surfaces.
- Castile Soap: Castile soap is a plant-based soap that is gentle yet effective for cleaning surfaces, including bathtubs. It can cut through grease and grime, and when diluted with water, it can create a safe and non-toxic cleaning solution.
- Lemon Juice: Lemon juice is a natural bleaching agent and has antibacterial properties, making it perfect for brightening a bathtub and killing germs. Its fresh scent also helps to leave the space smelling clean, and it can be mixed with baking soda for enhanced cleaning power.
- Essential Oils: Essential oils, such as tea tree oil or lavender oil, can provide antimicrobial benefits and leave a pleasant fragrance. Adding a few drops to your cleaning solution can enhance its effectiveness while also making your bathtub smell fresh and inviting.
How Can You Use Commercial Products in DIY Cleaning Solutions?
Using commercial products in DIY cleaning solutions can enhance their effectiveness and ensure a thorough clean for surfaces like bathtubs.
- Baking Soda: A versatile ingredient, baking soda acts as a gentle abrasive and deodorizer. When mixed with water or vinegar, it can effectively remove soap scum and hard water stains from bathtubs.
- White Vinegar: This natural acid is excellent for breaking down mineral deposits and soap residue. It can be used alone or combined with baking soda for a powerful cleaning reaction that helps restore shine to your bathtub.
- Dish Soap: A few drops of dish soap can cut through grease and grime effectively. When mixed with vinegar, it helps create a bubbly solution that lifts dirt and makes scrubbing easier.
- Hydrogen Peroxide: This disinfectant is great for killing mold and mildew that can accumulate in damp areas. It can be used as a spray on affected areas, providing a safe and effective way to sanitize your bathtub.
- Lemon Juice: Known for its natural acidity, lemon juice can help break down stains and provide a fresh scent. It can be used in combination with baking soda for a fizzy cleaning action that brightens surfaces.
- Essential Oils: Oils like tea tree or lavender not only add a pleasant fragrance but also possess antibacterial properties. Adding a few drops to your cleaning solutions can enhance their cleaning power while leaving a fresh aroma.
How Do You Properly Clean a Bathtub Using DIY Methods?
To properly clean a bathtub using DIY methods, there are several effective techniques and natural ingredients you can use.
- Baking Soda Paste: Mix baking soda with a small amount of water to create a thick paste. This paste can be applied to tough stains or areas with soap scum; let it sit for 15-20 minutes before scrubbing with a sponge, as baking soda acts as a mild abrasive that helps lift dirt without scratching the surface.
- Vinegar Spray: Fill a spray bottle with white vinegar and spray it generously on the bathtub surface. The acidity in vinegar helps dissolve mineral deposits and soap scum, and after letting it sit for a few minutes, you can wipe it clean with a cloth or sponge for a sparkling finish.
- Castile Soap Solution: Combine liquid Castile soap with warm water in a spray bottle for a natural cleaning solution. This biodegradable soap effectively cuts through grime and dirt while being gentle on the skin and the environment, making it ideal for regular maintenance of your bathtub.
- Lemon Juice Treatment: Use fresh lemon juice or a lemon-scented cleaner as a natural disinfectant. The citric acid in lemons helps to break down stains and adds a fresh scent, and you can apply it directly or mix it with baking soda for a powerful cleaning paste.
- Hydrogen Peroxide Mix: Mix equal parts of hydrogen peroxide and water in a spray bottle for a potent stain remover. Hydrogen peroxide is an effective disinfectant that can help brighten surfaces and eliminate bacteria; spray it on the tub and scrub after letting it sit for a few minutes.
What Preparation Steps Should You Take Before Cleaning the Bathtub?
Before cleaning the bathtub, it’s essential to prepare adequately to ensure an effective and safe cleaning process.
- Gather Cleaning Supplies: Collect all necessary cleaning materials such as baking soda, vinegar, a non-abrasive scrub brush, and any other preferred cleaners. Having everything on hand will save time and allow you to focus on the cleaning process without interruptions.
- Remove Items from the Bathtub: Clear the bathtub of all personal items, including bath mats, shampoo bottles, and toys. This creates an unobstructed workspace and helps prevent any damage to your belongings during the cleaning.
- Ventilate the Area: Open windows or turn on the exhaust fan to ensure proper ventilation while cleaning. This is particularly important if using strong chemical cleaners, as it helps to minimize exposure to fumes and ensures a more comfortable cleaning environment.
- Inspect for Damage: Check the bathtub for any cracks, chips, or other damage before starting the cleaning process. Identifying these issues early can help you avoid causing further damage while cleaning and determine if any repairs are required.
- Prepare the Cleaning Solution: If using a DIY solution, mix the ingredients, such as baking soda and vinegar, in a spray bottle or bowl. Preparing your cleaning solution in advance ensures it’s ready to be applied when you start cleaning, making the process smoother and more efficient.
What Are the Best Techniques for Cleaning Different Types of Bathtubs?
The best techniques for cleaning different types of bathtubs vary based on the material and the level of stains or grime present.
- Porcelain Bathtubs: For porcelain bathtubs, a mixture of baking soda and vinegar is highly effective. The baking soda acts as a gentle abrasive while vinegar helps to dissolve soap scum and hard water stains, making it easy to scrub away dirt without scratching the surface.
- Acrylic Bathtubs: Cleaning acrylic tubs requires a more delicate approach to avoid scratches. Using a mild dish soap mixed with warm water is recommended, as it effectively cleans without damaging the finish. A soft cloth or sponge should be used to wipe down the surfaces, followed by rinsing with clean water.
- Fiberglass Bathtubs: For fiberglass bathtubs, a paste made of baking soda and water can be applied to troublesome spots. After letting it sit for a while, gently scrubbing with a non-abrasive sponge will help lift stains without harming the smooth surface of the fiberglass.
- Cast Iron Bathtubs: Cast iron bathtubs, often coated with enamel, require a gentle cleaner to avoid chipping the enamel. A combination of hydrogen peroxide and baking soda can effectively tackle tough stains; it should be applied, allowed to sit, and then scrubbed gently with a soft brush.
- Stone Bathtubs: Natural stone bathtubs, like marble or granite, should be cleaned with a pH-balanced stone cleaner. Using acidic or abrasive cleaners can damage the surface, so a soft cloth and a gentle cleaner will help maintain the appearance and integrity of the stone.
What Common Stains Can Occur in Bathtubs and How Can They Be Removed?
Common stains in bathtubs can arise from various sources, but they can often be removed with effective DIY cleaning methods.
- Soap Scum: This residue forms from the combination of soap, hard water, and body oils, leading to a dull, filmy appearance.
- Hard Water Stains: These stains are caused by mineral deposits left behind when water evaporates, often appearing as white or chalky marks.
- Mold and Mildew: These fungi thrive in damp environments and can appear as dark spots or a black film, especially in corners or around caulking.
- Rust Stains: Typically caused by iron in the water, rust stains appear as orange or brown discolorations, often on porcelain or fiberglass tubs.
- Toothpaste Stains: These can leave a white film or colored marks, particularly if toothpaste splatters onto the tub during brushing.
Soap scum can be effectively removed using a mixture of vinegar and baking soda, which helps to dissolve the residue when scrubbed gently with a sponge.
To tackle hard water stains, a paste made from baking soda and water can be applied to the stains, left for a few minutes, and then scrubbed with a brush to lift the deposits.
Mold and mildew can be eliminated with a solution of bleach and water or a vinegar spray, which should be applied to the affected areas and scrubbed, ensuring good ventilation during the process.
For rust stains, applying a commercial rust remover or a paste of baking soda and vinegar can help lift the stains, with a gentle scrubbing afterward for best results.
Toothpaste stains can usually be wiped away with a damp cloth or sponge, and for stubborn marks, using a little bit of baking soda can help to scrub them clean without scratching the surface of the tub.
Which Methods Work Best for Getting Rid of Soap Scum and Hard Water Stains?
Several effective methods can help eliminate soap scum and hard water stains in your bathtub:
- Baking Soda and Vinegar: This classic combination works wonders for breaking down soap scum and mineral deposits.
- Lemon Juice and Borax: The acidity in lemon juice, combined with the abrasiveness of borax, makes for a powerful cleaning duo.
- Dish Soap and Hydrogen Peroxide: This mixture is not only effective at removing stains but also helps sanitize the surface.
- Commercial Hard Water Stain Remover: For stubborn stains, using a commercially available product can often provide immediate results.
- Magic Eraser: This handy sponge can tackle tough stains quickly without the need for additional cleaning agents.
Baking Soda and Vinegar: Start by sprinkling baking soda over the stained areas, then spray white vinegar on top. The fizzing reaction helps lift grime, making it easier to scrub away with a soft cloth or sponge.
Lemon Juice and Borax: Create a paste by mixing lemon juice with borax and apply it to affected areas. Let it sit for a few minutes before scrubbing, as the natural acidity of lemon juice will break down the stains while borax provides gentle abrasion.
Dish Soap and Hydrogen Peroxide: Mix equal parts of dish soap and hydrogen peroxide, then apply to the bathtub. This solution not only targets soap scum effectively but also disinfects the surface, leaving it clean and fresh.
Commercial Hard Water Stain Remover: If home remedies don’t work, consider using a specialized hard water stain remover. These products are formulated to tackle tough stains and often require minimal scrubbing, providing a convenient solution for busy households.
Magic Eraser: Simply dampen the Magic Eraser and scrub the stained areas without needing additional cleaners. Its unique texture allows it to penetrate and lift away tough soap scum and stains effortlessly.
How Do You Effectively Remove Mold and Mildew from Your Bathtub?
To effectively remove mold and mildew from your bathtub, consider the following methods:
- Baking Soda and Vinegar: This combination creates a powerful cleaning reaction that helps lift mold and mildew stains. Sprinkle baking soda on the affected areas, then spray with vinegar, allowing it to fizz and sit for at least 15 minutes before scrubbing and rinsing.
- Hydrogen Peroxide: A 3% hydrogen peroxide solution can be used as a mold killer due to its strong oxidizing properties. Spray it directly on the moldy surfaces, let it sit for about 10 minutes, scrub, and then rinse thoroughly.
- Bleach Solution: Mixing one cup of bleach with a gallon of water can effectively eliminate mold and mildew. Apply the solution to the affected areas, allow it to sit for a few minutes, scrub, and rinse well, ensuring proper ventilation during the process.
- Dish Soap and Water: For light mold and mildew, a simple mixture of dish soap and warm water can be effective. Use a sponge to scrub the areas, then rinse with clean water to remove any soap residue.
- Commercial Mold Removers: There are various commercial products specifically designed to tackle mold and mildew in bathrooms. Follow the manufacturer’s instructions carefully for the best results, and ensure to wear gloves and a mask for safety.
What Tips Can Help Improve Your DIY Bathtub Cleaning Routine?
To enhance your DIY bathtub cleaning routine, consider the following tips:
- Use Baking Soda and Vinegar: This classic combination is effective in breaking down soap scum and grime. Sprinkle baking soda on the tub surfaces, then spray a mixture of vinegar and water; the fizzing reaction helps lift dirt and stains.
- Opt for a Soft Scrub Brush: Using a soft-bristled scrub brush prevents scratching the surface while providing adequate scrubbing power. Focus on areas with tough stains, applying gentle pressure for the best results.
- Make a Lemon Juice Paste: Lemon juice is a natural cleaner and deodorizer. Combine it with baking soda to create a paste that can effectively tackle stains and leave your tub smelling fresh.
- Try Essential Oils: Adding a few drops of essential oils like tea tree or lavender can enhance your cleaning solution with antibacterial properties and a pleasant scent. This not only cleans but also provides a relaxing atmosphere while cleaning.
- Regular Maintenance: Incorporating a routine cleaning schedule into your weekly or biweekly chores can prevent buildup. A quick wipe-down after each use can significantly reduce the amount of deep cleaning needed later.
- Use a Squeegee: After each bath or shower, using a squeegee can help remove excess water from the tub’s surface. This simple step minimizes water spots and soap scum buildup, making it easier to maintain cleanliness over time.
How Can Regular Maintenance Slow Down Grime Buildup?
Regular maintenance can significantly slow down grime buildup in your bathtub by employing consistent cleaning practices and appropriate products.
- Frequent Cleaning: Regularly cleaning your bathtub prevents soap scum and dirt from accumulating. By dedicating a few minutes each week to wipe down surfaces, you reduce the likelihood of stubborn grime forming.
- Use of Gentle Cleaners: Utilizing mild, non-abrasive cleaners can help maintain the bathtub’s surface while effectively removing dirt. Harsh chemicals can damage the finish and encourage grime buildup, whereas gentle solutions keep surfaces smooth and easier to clean.
- Drying After Use: Drying the tub after each use can significantly reduce moisture that contributes to grime and mold growth. By eliminating water spots and dampness, you create a less hospitable environment for grime to develop.
- Routine Checks for Leaks: Regularly inspecting the plumbing and caulking can prevent water from seeping into areas that foster grime growth. Fixing leaks promptly diminishes the chance of moisture accumulation that contributes to mold and mildew.
- Using a Squeegee: Employing a squeegee after each shower can help remove excess water from the bathtub’s surface. This simple action minimizes water spots and reduces the chances of soap scum forming, leading to a cleaner bathtub over time.
What Essential Tools Should You Use for Efficient Bathtub Cleaning?
For efficient bathtub cleaning, several essential tools can make the process easier and more effective:
- Scrub Brush: A sturdy scrub brush with bristles is ideal for tackling tough stains and grime. It allows you to apply more force when needed and reach into crevices that may be hard to clean with a cloth.
- Microfiber Cloths: These cloths are excellent for wiping surfaces without scratching them. They are highly absorbent and can capture dust and grime effectively, making them perfect for a final wipe-down after scrubbing.
- Baking Soda: This natural abrasive is great for removing stains and odors from the bathtub. When combined with vinegar or water, it creates a paste that can tackle tough stains while being gentle on the tub’s surface.
- White Vinegar: Vinegar is a powerful natural cleaner that helps dissolve soap scum and mineral deposits. Its acidity can help sanitize the surface, making it a great choice for a thorough clean.
- Spray Bottle: A spray bottle filled with your cleaning solution, whether it be vinegar, a DIY cleaner, or a store-bought product, allows for even distribution of the cleaner across the tub’s surfaces. This makes it easier to apply and reduces waste.
- Gloves: Wearing gloves protects your hands from harsh chemicals and prevents skin irritation. They also provide a better grip while cleaning, allowing for more effective scrubbing.
- Old Toothbrush: An old toothbrush is perfect for scrubbing tight spaces and around fixtures. Its small size allows for detailed cleaning in corners and around edges that larger brushes may not reach.
- Bucket: A bucket can be used to rinse out the bathtub after cleaning or to mix your cleaning solutions. Using a bucket helps reduce water waste and makes the cleaning process more organized.