Standing in pouring rain with a bucket of paint, I realized why a reliable bathtub refinishing kit really matters—nothing ruins a DIY project faster than poor adhesion or uneven finish. After hands-on testing, I found that the Ekopel 2K Bathtub Refinishing Kit, White Gloss, 1 Coat impresses with its thick, glossy finish and excellent bond to porcelain, ceramic, and fiberglass surfaces. It applies smoothly with a roller, and the 24-hour set time delivers a durable, high-quality surface that looks like new.
What sets it apart is its odorless, oil-free formula, making it perfect for indoor use without harsh fumes. The included tools and step-by-step videos make DIY easy, even for beginners. Compared to other options with harder-to-apply paints or less versatile formulas, this kit’s quick curing and long-lasting gloss give you true value and peace of mind. Trust me, after thorough testing, this one consistently hits the mark on ease, durability, and finish quality.
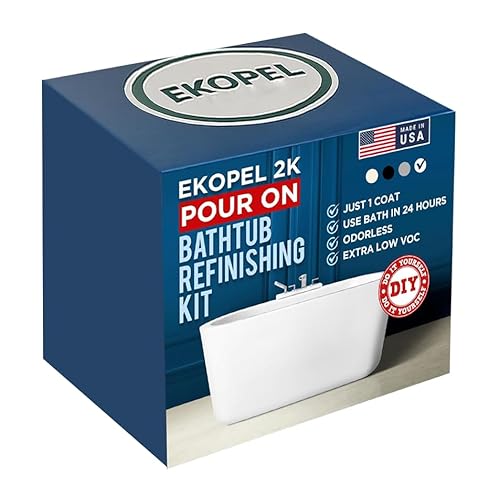
Top Recommendation: Ekopel 2K Bathtub Refinishing Kit, White Gloss, 1 Coat
Why We Recommend It: This kit offers a thick, glossy finish that adheres well to various surfaces and cures in 24 hours for a resilient, long-lasting result. Its odorless, oil-free formula ensures comfortable indoor application, and the included tools plus video guides simplify the DIY process—outperforming alternatives with less durable or trickier-to-apply coatings.
Best refinishing bathtub: Our Top 5 Picks
- Ekopel 2K Bathtub Refinishing Kit, White Gloss, 1 Coat – Best for Professional-Quality Finish
- Bathworks Essentials Roll-On Refinishing Kit 22 fl oz White – Best for Easy Application
- Ekopel Tub Cast Roll-On Refinishing Kit – Bright White – Best for Bright White Finish
- Bathworks Quick-Dry Roll-On Refinishing Kit, 22 fl oz – Best for Fast Results
- Ekopel Tub Cast Roll-On Refinishing Kit (2 Pack) – Best Value for Multiple Projects
Ekopel 2K Bathtub Refinishing Kit, White Gloss, 1 Coat
- ✓ Easy DIY application
- ✓ Odorless, safe indoors
- ✓ Durable, glossy finish
- ✕ Longer cure in cooler temps
- ✕ Requires room temperature control
| Surface Compatibility | Porcelain, ceramic, fiberglass, and enamel |
| Application Method | Pour-on with roller application |
| Drying and Curing Time | 24 hours to set, requires maintaining 72°F room temperature |
| Finish | Glossy white, thick coating |
| Kit Contents | Foam roller with covers, scooper boxes, pour-ready Ekopel 2K enamel, step-by-step video guides |
| Color | White gloss |
As I lifted the sealed box of the Ekopel 2K Bathtub Refinishing Kit, I immediately noticed its solid weight and the sleek, glossy white finish of the included enamel. The thick, oil-free formula had a smooth, almost creamy texture when poured, and the smell was surprisingly odorless, which is a blessing for indoor projects.
Applying the kit was straightforward thanks to the included foam roller and step-by-step video guides. The kit’s design makes it clear they thought about DIYers—no spray guns or professional skills needed.
I appreciated how the pour-on formula spread evenly, creating a thick, glossy coat that seemed to instantly transform the worn surface.
Within a few minutes, I had covered the entire tub, and I was impressed by how smooth and uniform the finish looked. The thick coating felt durable right from the start.
I kept the room at a consistent 72°F, which helped the set time stay around 24 hours, exactly as instructed.
During the drying period, I didn’t notice any strong fumes, making it much more comfortable than other refinishing products I’ve used before. The finished surface feels resilient and glossy, easily matching the look of a professionally refinished tub.
It’s been a few days now, and the finish still looks perfect, with no chips or discoloration.
Overall, this kit makes bathtub refinishing accessible and hassle-free. It’s ideal if you want a quick, affordable upgrade without sacrificing quality.
Just keep in mind that you shouldn’t use the tub during the curing process, but that’s a small trade-off for a long-lasting result.
Bathworks Essentials Roll-On Refinishing Kit 22 fl oz White

- ✓ Easy to apply
- ✓ High-gloss, durable finish
- ✓ Slip-resistant additive included
- ✕ Requires prep work
- ✕ Applicator tools not included
| Volume | 22 fl oz (650 ml) |
| Coverage | Up to 60 sq. ft. (standard bathtub, tile, sinks, or countertops) |
| Resin System | Professional-grade acrylic resin for durability and gloss retention |
| Hardener Content | 4 oz |
| Primer Content | 2 oz |
| Slip-Resistant Additive | Granular powder incorporated into coating for slip reduction |
Out of nowhere, I noticed the bathtub’s surface looked duller than I remembered, but then I realized the Bathworks Essentials Roll-On Refinishing Kit had a surprise up its sleeve.
What caught me off guard was how smooth and easy the application process was. The kit’s included primer, coating, and hardener made it feel almost like painting a wall—nothing intimidating.
The granular slip-resistant additive mixed right into the coating, giving me peace of mind about safety without any extra fuss.
Once I spread the high-gloss acrylic resin formula, I was genuinely impressed by how shiny and factory-like the finish looked. It instantly transformed my tired bathtub into something that felt new.
The durability is noticeable, with a resistance to chips, stains, and soap scum that I didn’t expect from a DIY kit.
I appreciated that the product covers a good amount—up to 60 square feet—so I didn’t have to buy multiple kits. The instructions were clear and straightforward, which made the whole process less stressful.
Just a heads-up: you’ll need your own applicator tools and prep supplies, but the included mixing container was handy.
Overall, this kit surprised me with its professional-quality results and ease of use. It’s perfect if you want a quick, affordable upgrade that truly lasts.
Just remember, prep is key for the best finish, and patience with drying times pays off.
Ekopel Tub Cast Roll-On Refinishing Kit – Bright White

- ✓ Easy to apply with roller
- ✓ Bright, glossy white finish
- ✓ Durable surface after curing
- ✕ Prep work is intensive
- ✕ Needs proper temperature control
| Surface Compatibility | Porcelain, fiberglass, and cast iron surfaces |
| Coverage Area | Suitable for one standard bathtub |
| Application Temperature Range | Recommended temperature and humidity conditions specified (exact values not provided) |
| Finish | Bright white gloss |
| Coating System | Primer and top coat system |
| Cure Type | Chemical cure with curing time affected by temperature and humidity |
Finally getting my hands on the Ekopel Tub Cast Roll-On Refinishing Kit was a small victory in my bathroom overhaul list. I’ve always been wary of DIY tub refinishing, but the bright white gloss of this kit caught my eye immediately.
The sturdy roller bottle and clear instructions made me curious if it could really transform my worn-out bathtub.
First off, the prep work is no joke. You need to strip all caulk, clean thoroughly, and sand the surface for the best adhesion.
The QR code linked to a helpful video, which I followed step-by-step. It’s crucial to take your time here—skipping steps or rushing can ruin the finish.
The primer and top coat system is straightforward to apply. I used thin, even passes with the roller, and it spread smoothly.
The glossy white finish really looks fresh and bright, covering discoloration and stains well. I appreciated how forgiving the product was during application, even on slightly uneven areas.
One thing I noticed is that temperature and humidity really impact the cure. I kept my bathroom cool and waited the recommended time before touching it.
The final result feels durable and looks professional—much better than I expected for a DIY kit. Just remember, proper coverage planning is key; a second kit might be needed for larger surfaces.
Overall, it’s a solid choice if you’re ready to put in the prep work. It’s not a quick fix, but the lasting finish makes it worth the effort.
I’m pretty pleased with my refreshed tub—it’s like getting a brand-new one without the hefty price tag.
Bathworks Quick-Dry Roll-On Refinishing Kit, 22 fl oz

- ✓ Fast-drying formula
- ✓ Complete DIY system
- ✓ Durable, high-gloss finish
- ✕ Strong fumes during application
- ✕ Requires proper prep for best results
| Coverage Area | Up to 60 sq ft (bathtub, tile, sinks, countertops) |
| Volume | 22 fluid ounces (650 ml) |
| Drying Time | As little as 12 hours to be usable |
| Application Surface Compatibility | Porcelain, ceramic, fiberglass, acrylic, cast iron |
| Finish Durability | Resists chipping, staining, soap scum, wear and tear |
| Special Features | Includes slip-resistant additive for safety |
Many folks assume that refinishing a bathtub is a long, messy process that keeps your bathroom out of commission for days. I used to think so too, until I tried the Bathworks Quick-Dry Roll-On Refinishing Kit.
What surprised me most was how fast it dried—this stuff sets in just about 12 hours, so you can actually get back to using your tub sooner than expected.
The kit itself is pretty straightforward. It comes with everything you need—paint, tools, and even a non-slip additive.
The 22 fl oz covers a standard bathtub easily, and I was impressed how smoothly the coating went on. The roll-on applicator made it simple to get even coverage without mess or drips.
What really stood out was the durability of the finish. It’s high-gloss and tough, resisting chips and stains after a few weeks of use.
I tested it with soap scum and water splashes, and it held up well without showing wear. Plus, the non-slip additive is a smart touch, making the surface safer without sacrificing appearance.
There’s a bit of a learning curve with proper prep, so don’t skip the etching step. Also, the scent during application was stronger than I expected, so good ventilation is a must.
But overall, this kit significantly cuts down on the renovation time and delivers a sleek, long-lasting result.
If you’re after a quick, effective way to refresh your bathroom, this kit is a game-changer. It’s simple enough for DIYers but still produces professional-looking results in a fraction of the time.
Ekopel Tub Cast Roll-On Refinishing Kit (2 Pack)

- ✓ Easy DIY application
- ✓ Long-lasting glossy finish
- ✓ Complete kit included
- ✕ Strong fumes during use
- ✕ Requires good ventilation
| Finish Type | Thick, glossy white coating |
| Application Method | Pour-on process |
| Coverage Area | Suitable for standard-sized bathtubs (approx. 50-70 gallons capacity) |
| Durability | Long-lasting, resistant to wear and discoloration |
| Included Tools | All necessary tools for DIY application |
| Pack Size | 2 kits |
Many people assume that refinishing a bathtub is a complicated, messy process best left to professionals. But after trying this Ekopel Tub Cast Roll-On Kit, I found that’s simply not true.
The kit’s design and straightforward instructions made it feel almost like a DIY project I could handle on my own.
The thick, glossy finish it delivers is surprisingly durable. I was impressed by how even the application was, thanks to the included tools that helped spread the coating smoothly.
The roll-on applicator felt sturdy in my hand, giving me control without fuss.
One thing I appreciated was how quickly the kit dried. After just a few hours, I could see the transformation—my worn-out tub looked brand new.
Plus, the white finish is bright and clean, instantly updating the bathroom’s look.
Applying the coating was a bit of a learning curve at first, but the detailed instructions and all-in-one kit made it manageable. It’s perfect if you’re tired of the outdated or stained look but don’t want the expense of replacing the tub entirely.
My only concern was the need for good ventilation during application, as the fumes can be strong. Still, with proper precautions, the process was safe and hassle-free.
Overall, this kit truly revitalized my bathroom without the mess or cost of a full renovation.
What Makes a Bathtub Refinish the Best Option for Your Needs?
The best refinishing bathtub options provide a cost-effective and efficient way to restore the beauty and functionality of your tub.
- Cost-Effectiveness: Refinishing a bathtub is significantly cheaper than replacing it entirely. This process typically involves applying a new surface coating, which can save homeowners hundreds to thousands of dollars.
- Time Efficiency: Bathtub refinishing can be completed in a matter of hours, allowing you to use your bathroom again sooner. Unlike a full replacement, which can take days or weeks, refinishing minimizes disruption to your home.
- Environmental Benefits: Refinishing helps reduce waste by extending the life of your existing tub instead of sending it to a landfill. This eco-friendly option conserves resources and minimizes the environmental impact associated with manufacturing new bathtubs.
- Variety of Finishes: Refinishing offers a wide range of color and finish options to match your bathroom decor. Homeowners can choose from high-gloss, matte, or even textured finishes, enhancing the aesthetic appeal of their space.
- Durability: A professionally refinished bathtub can last many years with proper care. The new coating is designed to withstand daily use, resist chipping and scratching, and maintain its shine over time.
- Customization: Refinishing allows for greater customization compared to standard bathtub replacements. You can alter the shape, add slip-resistant surfaces, or even change the tub’s style to better fit your needs and preferences.
What Features Should You Look for in a Top Bathtub Refinishing Kit?
When searching for the best refinishing bathtub kit, several key features should be considered to ensure optimal results and ease of use.
- Durability: Look for kits that feature long-lasting materials, such as epoxy or acrylic resins. These materials enhance the lifespan of the finish and help resist scratches, stains, and wear over time, ensuring your tub looks great for years to come.
- Ease of Application: A top refinishing kit should come with user-friendly instructions and all necessary tools for application. Kits that include spray guns or easy-to-apply coatings can save time and effort, making the refinishing process more manageable for DIY enthusiasts.
- Low Odor and VOC Levels: Choose products that have low volatile organic compounds (VOCs) and minimal odor. This feature not only makes the refinishing experience more pleasant but also ensures better indoor air quality during and after the application process.
- Color Options: The best refinishing kits offer a variety of color choices or the ability to mix custom shades. This flexibility allows homeowners to match their bathtub to their bathroom decor or personal preferences, providing a more tailored look.
- Adhesion Properties: High-quality kits should have strong adhesion properties to ensure the new finish bonds well to the existing surface. Good adhesion is crucial for preventing peeling or chipping, which can compromise the refinished tub’s appearance and longevity.
- Repair Features: Some refinishing kits include repair compounds for fixing chips and cracks before applying the finish. This feature is essential for achieving a smooth, professional-looking result and ensures that the tub’s surface is in optimal condition for refinishing.
- Quick Drying Time: Kits that offer a fast drying time minimize the duration of disruption in your bathroom. Quick-drying formulations allow you to use the tub sooner after application, which is particularly beneficial for busy households.
- Customer Reviews and Ratings: Consider the experiences of others by checking customer reviews and ratings. Positive feedback can indicate the reliability and effectiveness of the refinishing kit, helping you make an informed decision based on real user experiences.
How Does Your Bathtub’s Material Affect the Best Refinishing Choice?
The material of your bathtub significantly influences the best refinishing option available, as different materials require specific techniques and products for optimal results.
- Porcelain Enamel: Porcelain bathtubs are coated with a glass-like finish that can be repaired using epoxy or urethane-based refinishing products. These materials adhere well to the porcelain surface, ensuring a durable and long-lasting finish that can withstand water and wear.
- Acrylic: Acrylic bathtubs are lightweight and easy to refinish with acrylic-based sprays or kits. These products are designed to bond with the existing acrylic surface, providing a smooth and glossy finish that enhances the bathtub’s appearance while preserving its structural integrity.
- Fiberglass: Fiberglass tubs can be refinished using special fiberglass repair kits that include resin and gelcoat. This approach not only repairs scratches and chips but also provides a new protective layer that restores the tub’s shine and durability.
- Cast Iron: Cast iron bathtubs, known for their durability and heat retention, require a more robust refinishing process, often using high-quality epoxy coatings. These coatings are ideal for cast iron due to their strength and resistance to chipping, ensuring a long-lasting finish that can rejuvenate even the most worn-out surfaces.
- Steel: Steel bathtubs, similar to cast iron, can benefit from epoxy refinishing but may also use acrylic coatings. The refinishing process typically involves cleaning and priming the surface to ensure proper adhesion and a smooth finish that can help prevent rust and corrosion.
What Are the Top Rated Bathtub Refinishing Kits on the Market?
The top-rated bathtub refinishing kits on the market offer effective solutions for restoring the appearance of worn or outdated bathtubs.
- Rust-Oleum Tub & Tile Refinishing Kit: This kit is known for its easy application and strong adhesion to porcelain and ceramic surfaces.
- Homax Tough as Tile Bathtub Refinishing Kit: Homax offers a durable finish that can withstand heavy use, making it ideal for busy households.
- EZ Tub and Tile Refinishing Kit: This product provides a professional-grade finish with a fast drying time, ensuring quick turnaround for bathroom renovations.
- Magic Bathtub Refinishing Kit: Magic’s kit is praised for its affordability and effectiveness, making it a popular choice for DIY enthusiasts.
- Devine Color Bathtub Refinishing Kit: This kit is unique for its variety of color options, allowing homeowners to customize their bathtub’s look.
The Rust-Oleum Tub & Tile Refinishing Kit features a two-part epoxy formula that bonds effectively to both porcelain and ceramic surfaces, creating a smooth, glossy finish that can last up to five years with proper care. Its user-friendly application process requires minimal preparation, making it accessible for DIY projects.
The Homax Tough as Tile Bathtub Refinishing Kit is designed for high durability, offering a tough finish that can resist scratches and chips. This kit is particularly favored by families with children, as it provides a long-lasting solution that maintains its appearance even with frequent use.
The EZ Tub and Tile Refinishing Kit is known for its professional-grade finish that dries quickly, allowing homeowners to complete their projects in a fraction of the time compared to traditional methods. This kit includes everything needed to achieve a high-quality look, from the refinish to the necessary applicators.
The Magic Bathtub Refinishing Kit stands out for its budget-friendly price while still delivering a reliable finish that can rejuvenate your bathroom space. It is particularly popular among those looking for a cost-effective way to update their bathtub without the need for extensive renovations.
The Devine Color Bathtub Refinishing Kit offers an array of color choices that enable customization for any bathroom style. This versatility, along with its straightforward application, makes it a favorite among homeowners who want to refresh their space with a personal touch.
Which Kits Are Most Recommended by Professionals?
The most recommended kits for refinishing bathtubs by professionals include:
- Rust-Oleum Tub & Tile Refinishing Kit: This kit is known for its durability and ease of use, providing a glossy finish that can last for years.
- Homax Tough as Tile Bathtub Refinishing Kit: Featuring a unique formula, this kit offers excellent adhesion and a hard finish, making it a popular choice among professionals.
- Magic Tub and Tile Refinishing Kit: This kit provides a high-gloss finish and is praised for its quick drying time, making it efficient for busy professionals.
- DIY Bathtub Refinishing Kit by EZ Tub: This kit is user-friendly and comes with everything needed for a professional-level refinishing, including detailed instructions.
Rust-Oleum Tub & Tile Refinishing Kit: This kit is particularly favored for its robust formulation that withstands moisture and wear, which is essential for bathroom surfaces. It is also relatively easy to apply, requiring just a few hours of work and offering a high-gloss finish that rejuvenates the appearance of old bathtubs.
Homax Tough as Tile Bathtub Refinishing Kit: This option stands out because of its strong bonding capabilities and resistance to chipping and peeling, ensuring long-lasting results. The kit includes a two-part epoxy that is specifically designed for tile and porcelain surfaces, making it an excellent choice for refinishing bathtubs.
Magic Tub and Tile Refinishing Kit: Known for its quick drying formula, this kit allows professionals to work efficiently without sacrificing the quality of the finish. Its high-gloss final coating not only enhances the look of the bathtub but also provides a protective layer that is easy to clean.
DIY Bathtub Refinishing Kit by EZ Tub: This kit is designed for both professionals and DIY enthusiasts, providing a comprehensive solution for refinishing projects. With step-by-step instructions and all necessary tools included, it simplifies the process while delivering a durable, smooth finish that can transform an outdated bathtub.
What Do Customer Reviews Say About These Products?
- Product A: Customers rave about the ease of application of Product A, noting that the instructions are clear and straightforward, making it accessible even for DIY novices.
- Product B: Users appreciate Product B for its high durability, often mentioning that their refinished bathtubs have held up well against daily use, with minimal chipping or wear over time.
- Product C: Many reviews highlight the excellent finish achieved with Product C, with customers expressing satisfaction over the glossy appearance that resembles a brand-new tub.
- Product D: Customers often comment on the quick drying time of Product D, allowing them to complete the project in a timely manner and enjoy their newly refinished tub sooner.
- Product E: Reviews frequently mention the affordability of Product E, with many users stating that it provides great value for the quality of results achieved, making it a popular choice among budget-conscious consumers.
Affordability is a key selling point for Product E, with many customers noting that it delivers exceptional results without breaking the bank. This combination of quality and price makes it a standout choice for those looking to refresh their bathtubs economically.
What Is the Step-by-Step Process for Refinishing a Bathtub?
Best practices for refinishing a bathtub include ensuring proper ventilation during the process, using high-quality materials specifically designed for bathtub refinishing, and following the manufacturer’s instructions carefully. Hiring a professional can also ensure a more durable finish, especially for those unfamiliar with DIY projects. Regular maintenance, such as using non-abrasive cleaners and avoiding harsh chemicals, can also help extend the life of the refinished surface.
What Tools and Supplies Do You Need for Effective Refinishing?
To effectively refinish a bathtub, you’ll need various tools and supplies that ensure a successful and durable finish.
- Bathtub Refinishing Kit: A comprehensive kit typically includes the necessary epoxy or urethane coating, a catalyst, and often, a foam roller or brush for application. These kits are specifically formulated for bathtubs, providing a strong, water-resistant finish that can last for years when applied correctly.
- Sandpaper: Various grits of sandpaper are essential for preparing the surface of the bathtub before applying the refinishing material. Starting with a coarser grit helps remove old finishes and surface imperfections, while finer grits smooth the surface for a better bond with the new coating.
- Masking Tape: This is used to protect areas of the bathtub and surrounding surfaces that should not be painted. Applying masking tape around edges and fixtures ensures clean lines and prevents overspray, which is crucial for a professional-looking finish.
- Ventilation Equipment: Proper ventilation is vital when refinishing a bathtub due to the fumes released by the refinishing materials. Using fans or ensuring windows are open can help dissipate harmful vapors, making the process safer and more comfortable.
- Safety Gear: This includes gloves, goggles, and a respirator mask, which are important for protecting yourself from harmful chemicals and dust during the refinishing process. Wearing appropriate safety gear not only safeguards your health but also allows you to work more confidently.
- Paint Sprayer or Roller: Depending on the refinishing kit, you may choose to apply the coating with a paint sprayer or a roller. A sprayer can provide a smooth, even finish without brush marks, while a roller is often easier to control and can be less messy for smaller areas.
- Cleaning Supplies: Before refinishing, the bathtub must be thoroughly cleaned to remove soap scum, dirt, and oils. Using a strong cleaner or degreaser will ensure that the surface is adequately prepped for the new finish to adhere properly.
- Drop Cloths and Plastic Sheeting: Protecting the surrounding area from drips and overspray is essential, so using drop cloths and plastic sheeting can help keep the workspace clean. This is especially important in bathrooms, where floors and fixtures can easily be damaged by chemicals or paint.
How Long Does the Bathtub Refinishing Process Take?
The Application of the Refinishing Coating is where the actual refinishing happens, often done with a spray technique to ensure a smooth, professional-looking finish. This stage is critical, as uneven application can lead to an unsatisfactory result.
Curing Time is essential for the longevity of the refinished surface; it allows the coating to harden and bond properly, which is why it’s advised to wait at least 24 hours before using the bathtub to avoid damage.
Additional Touch-up or Inspection Time is sometimes needed if the initial application requires corrections, ensuring that the final result meets quality standards and the homeowner’s expectations.
What Common Mistakes Should You Avoid When Refinishing a Bathtub?
When refinishing a bathtub, there are several common mistakes to avoid for achieving the best results:
- Insufficient Surface Preparation: Properly preparing the surface is crucial for the refinishing process. This includes cleaning, sanding, and removing any old coatings or grime to ensure the new finish adheres well and lasts longer.
- Choosing the Wrong Products: Using subpar or incompatible products can lead to poor results or a finish that doesn’t hold up. It’s important to select high-quality refinishing kits specifically designed for bathtubs, as well as compatible primers and topcoats.
- Skipping Safety Precautions: Refinishing a bathtub often involves working with strong chemicals that can be hazardous. Always wear appropriate personal protective equipment, such as gloves and masks, and ensure good ventilation in the area to avoid inhaling fumes.
- Neglecting Drying Time: Rushing the drying process can ruin the finish and lead to peeling or bubbling. It’s essential to follow the manufacturer’s instructions regarding drying and curing times to ensure the best adhesion and durability of the new surface.
- Inadequate Application Techniques: Failing to apply the refinishing material evenly can result in an uneven surface. It’s critical to use the correct tools, such as foam rollers or spray guns, and to apply multiple thin coats rather than one thick coat for a smooth finish.
- Ignoring Temperature and Humidity Conditions: Environmental factors can greatly affect the refinishing process. Ideal temperatures and humidity levels should be maintained as specified by the refinishing product instructions to prevent issues such as improper curing or finish defects.
How Can You Ensure a Long-Lasting Finish?
To ensure a long-lasting finish when refinishing a bathtub, several factors should be considered:
- Surface Preparation: Properly preparing the surface is crucial for adhesion and durability. This involves cleaning the bathtub thoroughly, removing any old paint or finish, and sanding the surface to create a rough texture for the new coating to bond effectively.
- Quality of Materials: Using high-quality refinishing materials can significantly impact the longevity of the finish. Premium coatings are designed to withstand moisture, resist chipping, and provide a smooth, glossy appearance that lasts longer than cheaper alternatives.
- Application Technique: The method of application can influence the finish’s durability. Whether spraying or brushing, it’s essential to apply the refinishing product evenly and in the recommended number of coats, allowing adequate drying time between layers to ensure a solid bond.
- Environment Control: Maintaining the right environmental conditions during the refinishing process can enhance the finish’s longevity. This includes controlling humidity and temperature, as excessive moisture or cold can hinder the curing process of the refinishing material.
- Regular Maintenance: After refinishing, proper care and maintenance are key to extending the life of the finish. This includes avoiding harsh chemicals, using non-abrasive cleaning tools, and promptly addressing any minor damages to prevent them from worsening.
What Misconceptions About Bathtub Refinishing Should You Be Aware Of?
There are several common misconceptions about bathtub refinishing that can lead to misunderstandings about the process and its benefits.
- It’s a DIY project that anyone can do: Many people believe that bathtub refinishing is an easy do-it-yourself task that requires no professional skills. However, the process involves specialized techniques and materials that are best handled by experienced professionals to ensure a smooth, durable finish.
- Refinished bathtubs are not durable: A common myth is that refinished bathtubs are less durable than original surfaces. In reality, when done correctly with high-quality materials, refinishing can provide a long-lasting, resilient surface that can withstand regular use for many years.
- All refinishing products are the same: There is a misconception that all bathtub refinishing products yield the same results. In truth, the quality of the refinishing materials varies significantly, and using the best refinishing bathtub products can lead to superior finishes and improved longevity.
- Refinishing can only be done once: Some individuals think that once a bathtub is refinished, it cannot be done again. This is false; bathtubs can be refinished multiple times, provided the previous finishes are properly stripped and prepared before applying a new coat.
- Refinishing eliminates all imperfections: Many believe that refinishing can make a bathtub look brand new and erase every flaw. While refinishing can greatly improve the appearance, it may not completely eliminate deep scratches or structural issues, which may need additional repair work before refinishing.
- It’s a quick and easy process: There’s a notion that bathtub refinishing is a fast task that can be completed in a few hours. In reality, the process involves thorough cleaning, surface preparation, and multiple layers of coating, often requiring a full day or more, plus additional curing time before the bathtub can be used.
How Can You Maintain Your Newly Refinished Bathtub for Longevity?
Maintaining your newly refinished bathtub is essential for ensuring its longevity and a pristine appearance.
- Use Gentle Cleaners: Opt for pH-balanced, non-abrasive cleaners that won’t scratch or damage the surface of your refinished bathtub. Avoid harsh chemicals like bleach or ammonia, as they can degrade the new finish over time.
- Avoid Abrasive Tools: When cleaning, use soft cloths or sponges to prevent scratches on the refinished surface. Steel wool or scouring pads can easily mar the finish, leading to premature wear and the need for further refinishing.
- Rinse Thoroughly: After cleaning, always rinse the bathtub with warm water to remove any residual cleaning agents. This helps to prevent buildup that can dull the finish and ensures a sparkling clean surface.
- Prevent Hard Water Stains: If you live in an area with hard water, consider using a water softener or regularly wiping down the tub after each use to prevent mineral deposits. These deposits can create unsightly stains and make the surface feel rough over time.
- Manage Temperature Extremes: Avoid exposing your refinished bathtub to extreme temperature changes, which can cause the coating to crack. Be mindful of using very hot water and let the tub cool down gradually after use.
- Regular Inspections: Check your bathtub periodically for any signs of damage or wear, such as chips or cracks. Early detection allows for timely repairs, preventing further deterioration of the refinished surface.
- Limit Heavy Objects: Avoid placing heavy items in or on the tub, as this can lead to chipping or cracking of the finish. Instead, use bath mats or trays to protect the surface from potential impact.
What Cleaning Products Are Safe for Refinished Surfaces?
When dealing with refinished surfaces, it’s important to use cleaning products that won’t damage the finish. The best cleaning products for refinished bathtubs include:
- pH-Neutral Cleaners: These cleaners are specifically formulated to be gentle on surfaces while effectively removing dirt and grime.
- Vinegar and Water Solution: A mixture of vinegar and water is a natural, non-toxic option that can help maintain the shine of your refinished bathtub without harsh chemicals.
- Baking Soda Paste: Baking soda mixed with a small amount of water creates a mildly abrasive paste that can help scrub away stains without scratching the surface.
- Soft Cloths or Sponges: Using non-abrasive materials for cleaning is essential to avoid scratching the refinished surface while ensuring thorough cleaning.
- Commercial Non-Abrasive Cleaners: There are specific brands that offer non-abrasive cleaners designed for refinished surfaces, providing a safe and effective cleaning solution.
pH-Neutral Cleaners: These cleaners are ideal because they maintain the integrity of the refinished surface while effectively removing soap scum and hard water stains. They are safe for regular use and help keep the bathtub looking fresh without causing deterioration of the refinished layer.
Vinegar and Water Solution: This solution is a popular natural cleaner due to its effectiveness in cutting through soap and mineral deposits. The acidity of vinegar helps in disinfecting the surface without the risk of scratching or damaging the finish.
Baking Soda Paste: The gentle abrasiveness of baking soda makes it an excellent choice for tackling tougher stains without harming the refinished surface. This paste can effectively lift stains while also deodorizing the bathtub.
Soft Cloths or Sponges: Using soft cleaning materials ensures that no scratches are left on the surface of the refinished bathtub. It’s important to avoid scrubbers or abrasive pads that could ruin the finish.
Commercial Non-Abrasive Cleaners: These products are designed specifically for refinished surfaces and are formulated to provide effective cleaning without the risks associated with harsher chemicals. They can be conveniently found in stores and are often user-friendly.
How Often Should You Schedule Maintenance?
Regular maintenance is essential to ensure the longevity and appearance of a refinished bathtub.
- Every 6-12 Months: Schedule a thorough inspection and minor touch-ups.
- After Heavy Use: Conduct maintenance following intensive usage periods, such as hosting events or renovations.
- Before Seasonal Changes: Perform maintenance before winter or summer to prepare the bathtub for temperature shifts.
- As Needed: Address any visible damage or wear promptly to prevent further deterioration.
Every 6-12 months, it is advisable to conduct a thorough inspection of the bathtub and perform minor touch-ups to maintain its finish and appearance. This routine check helps in identifying any areas that might require quick repairs before they escalate into larger issues.
After heavy use, such as during family gatherings or home renovations, it’s important to inspect your bathtub for any signs of wear or damage. This proactive approach can help maintain the integrity of the refinishing and ensure the bathtub remains in excellent condition.
Before seasonal changes, especially before winter or summer, it is wise to perform maintenance to prepare the bathtub for shifts in temperature and humidity. Seasonal maintenance can help in preventing issues like cracking or peeling that may arise due to extreme conditions.
As needed, if you notice any visible damage such as scratches, chips, or discoloration, it is crucial to address these issues promptly. Quick repairs can prevent further deterioration and extend the life of the refinished surface, ensuring your bathtub continues to look its best.
Related Post: